
STC-1000 Fermentation Chamber Build
Yeast stress is likely caused by one of two things- an un-viable or inappropriately sized pitching colony or poor fermentation control. Sidestepping the first issue (if you’re brewing 5 Gall. batches at less that 1.060 SG use a packet, if not make a starter), fermentation off-flavours very likely have a lot to do with a temperature that is either too high or too low. Fortunately there are a few fixes to this problem at home. The simplest involves just using a wet towel and relying on evaporative cooling to control the temperature of your carboy. This is actually surprisingly effective, and just by being aware of fermentation temperature you are likely to make better beer (those stick on thermometers are really handy and cost almost nothing.) The next step from here costs a bit more and takes up some space, but is the obvious progression, especially if you live somewhere with very high/low temperatures. This is to build a fermentation chamber to give ideal temperature conditions year round.
To build a fermentation chamber you need a couple of things: most obviously an insulated, air-tight space and a means of cooling the air inside it. It seems to me that a fridge or freezer fits this criteria pretty well, although a lot of people just use a polystyrene cooler attached to a smaller fridge, which is probably cheaper. As far as which fridge/freezer- if you want to lager under 4ºC, get a freezer, if not get whatever is cheapest. The good people at homebrewtalk have made this comparison of pretty much every new fridge or freezer on the market which shows how much you can actually fit inside them, although this project will work just as well with the old fridge you have sitting in the far corner of the garage. The guide covers both carboys and kegs, which brings me to another advantage of a fridge/freezer- you can also convert it into a part time kegerator when you aren’t using it to ferment.
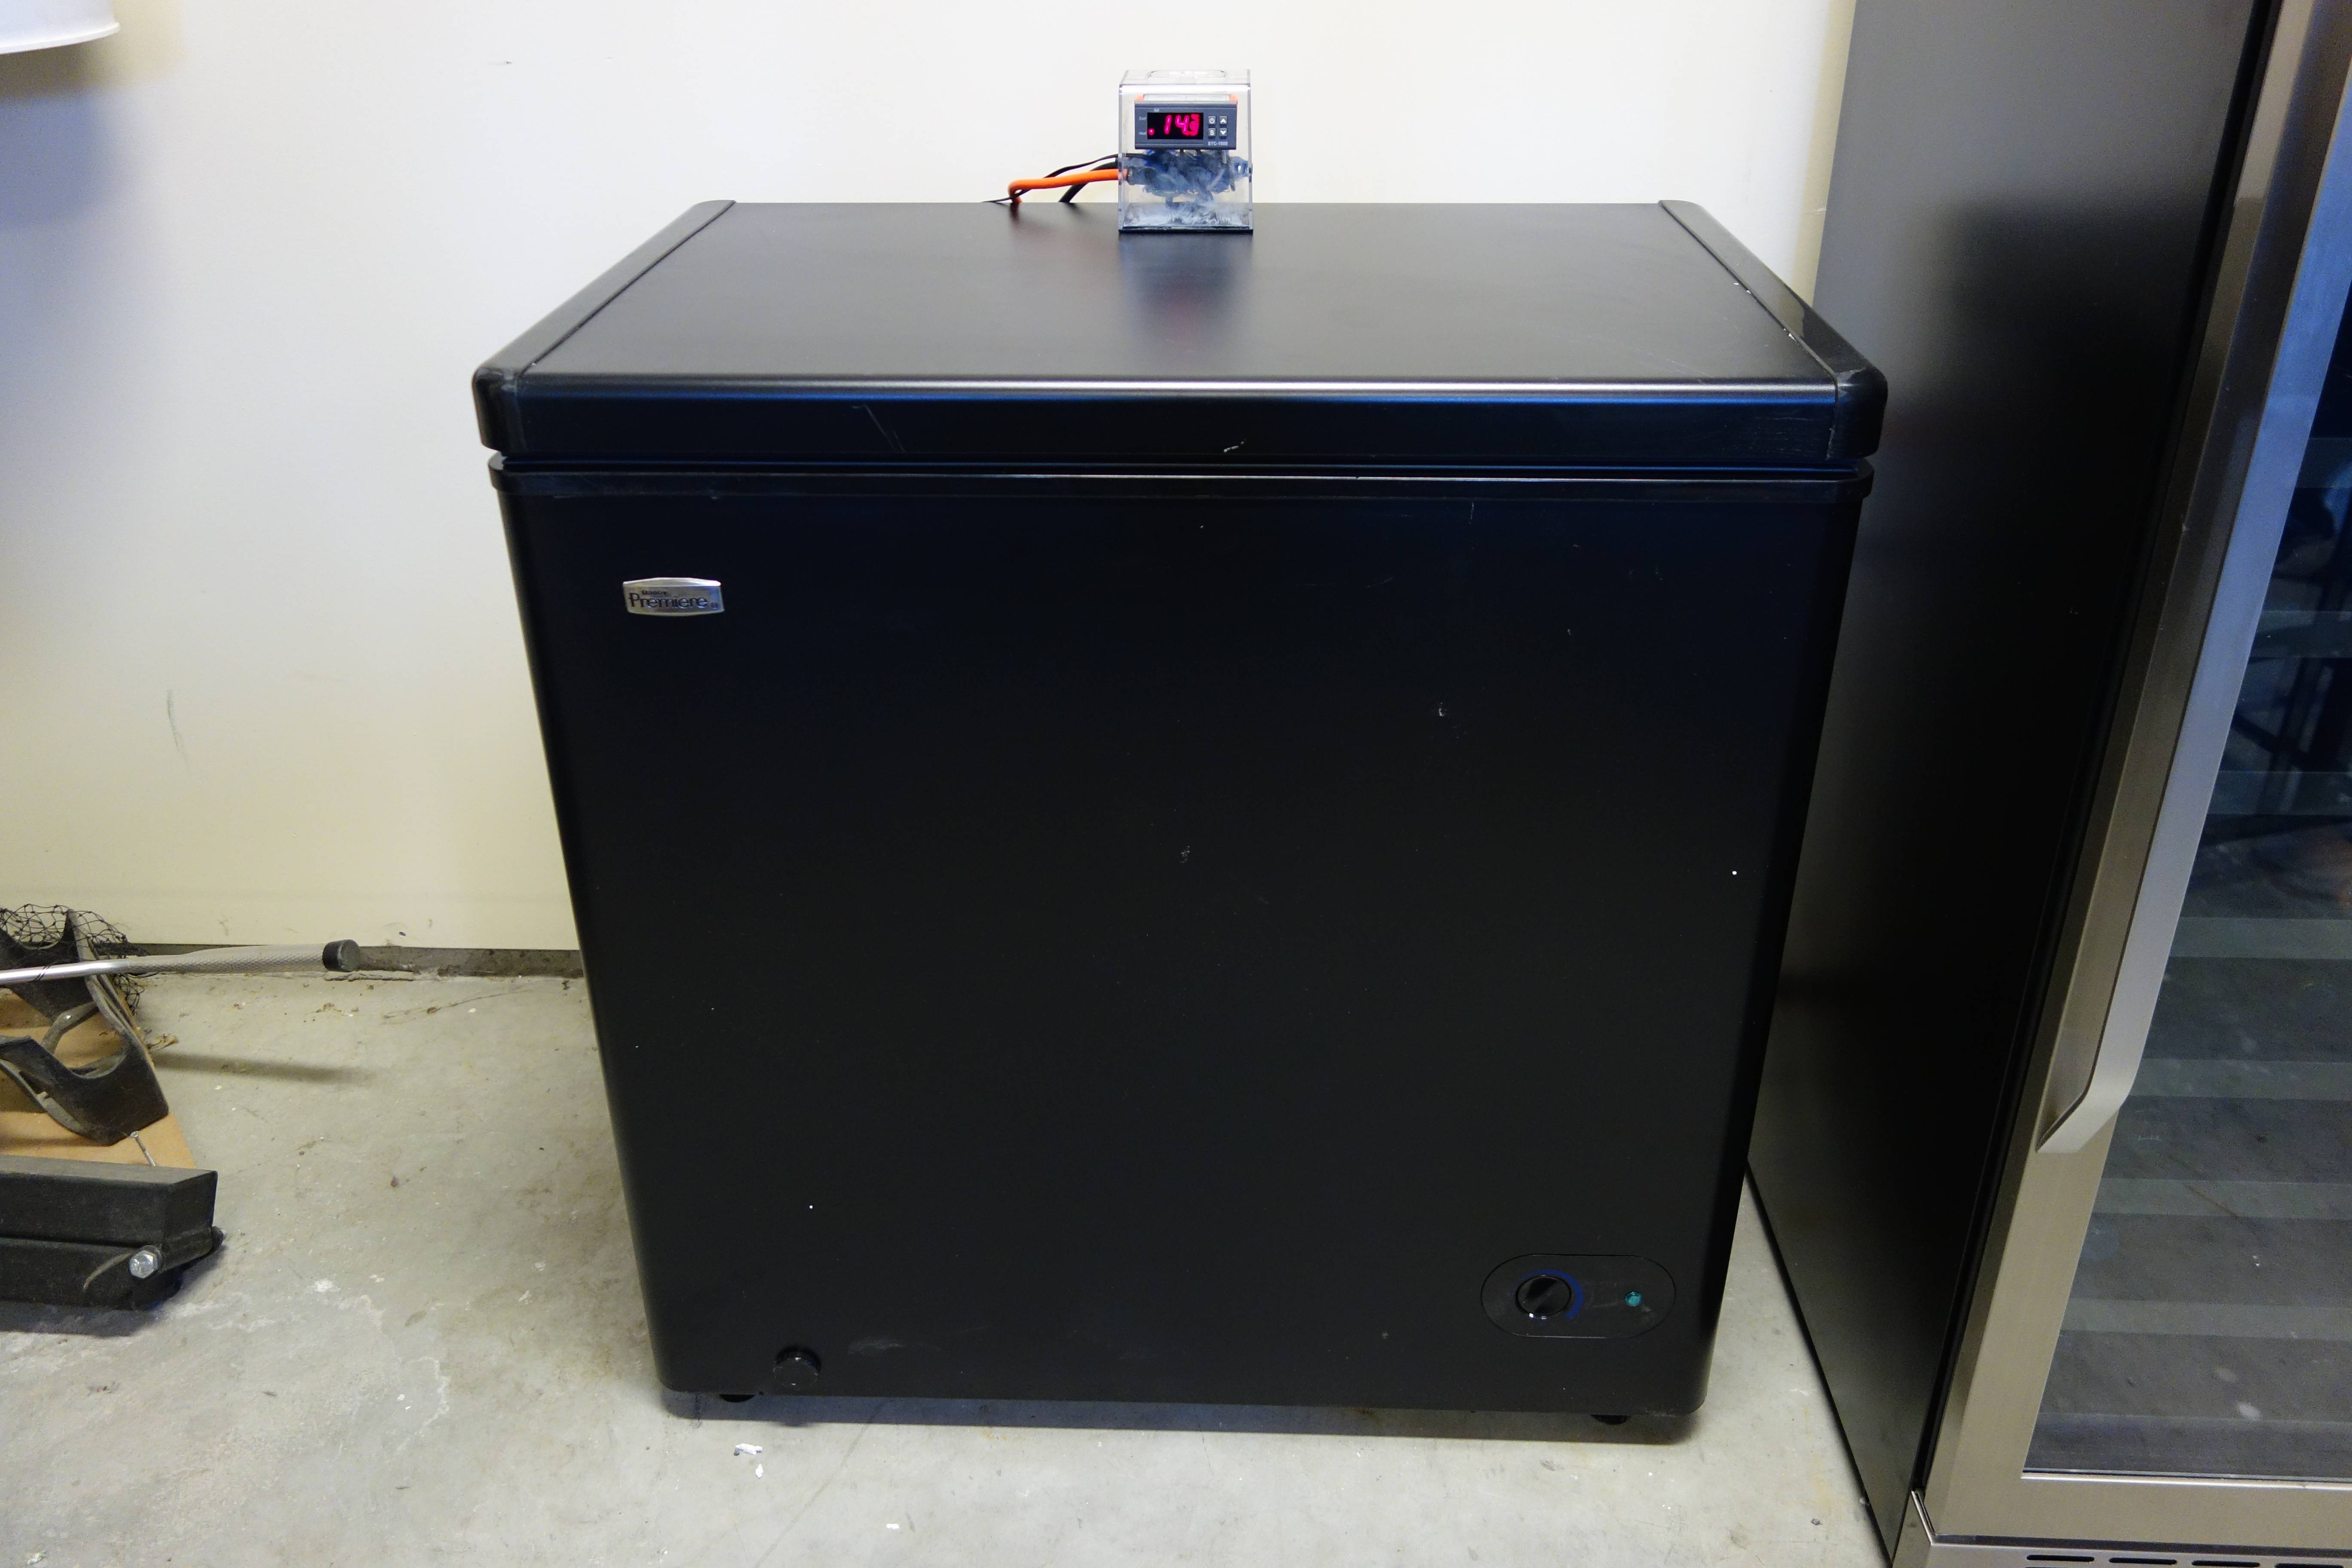
The last thing you’ll need is a means of regulating the temperature of the fridge/freezer. If you have a fridge, you might be able to get away with just using the thermostat on the appliance. If you have/buy a freezer like I did, you’ll need a separate temperature controller. These work by turning the appliance on or off based on the reading from a probe, which you can put near or even in your fermenting beer. Here you have another two options: buy a ready built temperature controller, which range in price from about $60-200 depending on specification, or build your own which is a bit cheaper. I took the second option, picking up an STC-1000 from amazon.ca for $27 (about 15 quid). These controllers come highly recommended by both homebrewers and aquarium/reptile tank owners, and funnily enough are almost identical to the ones supplied my many brewery engineering firms.

One thing that’s really cool about these controllers is that they are tiny. So if you are more handy than me it’d no doubt be quite easy to build the controller into the appliance you are intending to use as a fermentation chamber/kegerator. As it is I’m not that handy, and didn’t want to start hacking apart a new freezer, so I built mine into an external housing. This does have the advantage of being easier to take apart if it breaks or lend to a friend if you’re nice, but isn’t quite as neat a solution.
The downside of going the DIY route is obviously the DIY itself, and the controller basically needs to be wired to a power source and two power outlets. I don’t really want to do a ‘how-to’ guide to assembling it here, as I’m really not the sort of person you’d want to take electronics advice from. And my advice if you’re not confident of wiring a socket into a mains supply would be to get help from a professional electrician. However, I’m pretty much a total electrical novice and didn’t find the wiring all that tough. If you do want to do the project you’ll need a few things other than the controller- some wire, a project housing (I used the box my GoPro came in) and a duplex wall receptacle.
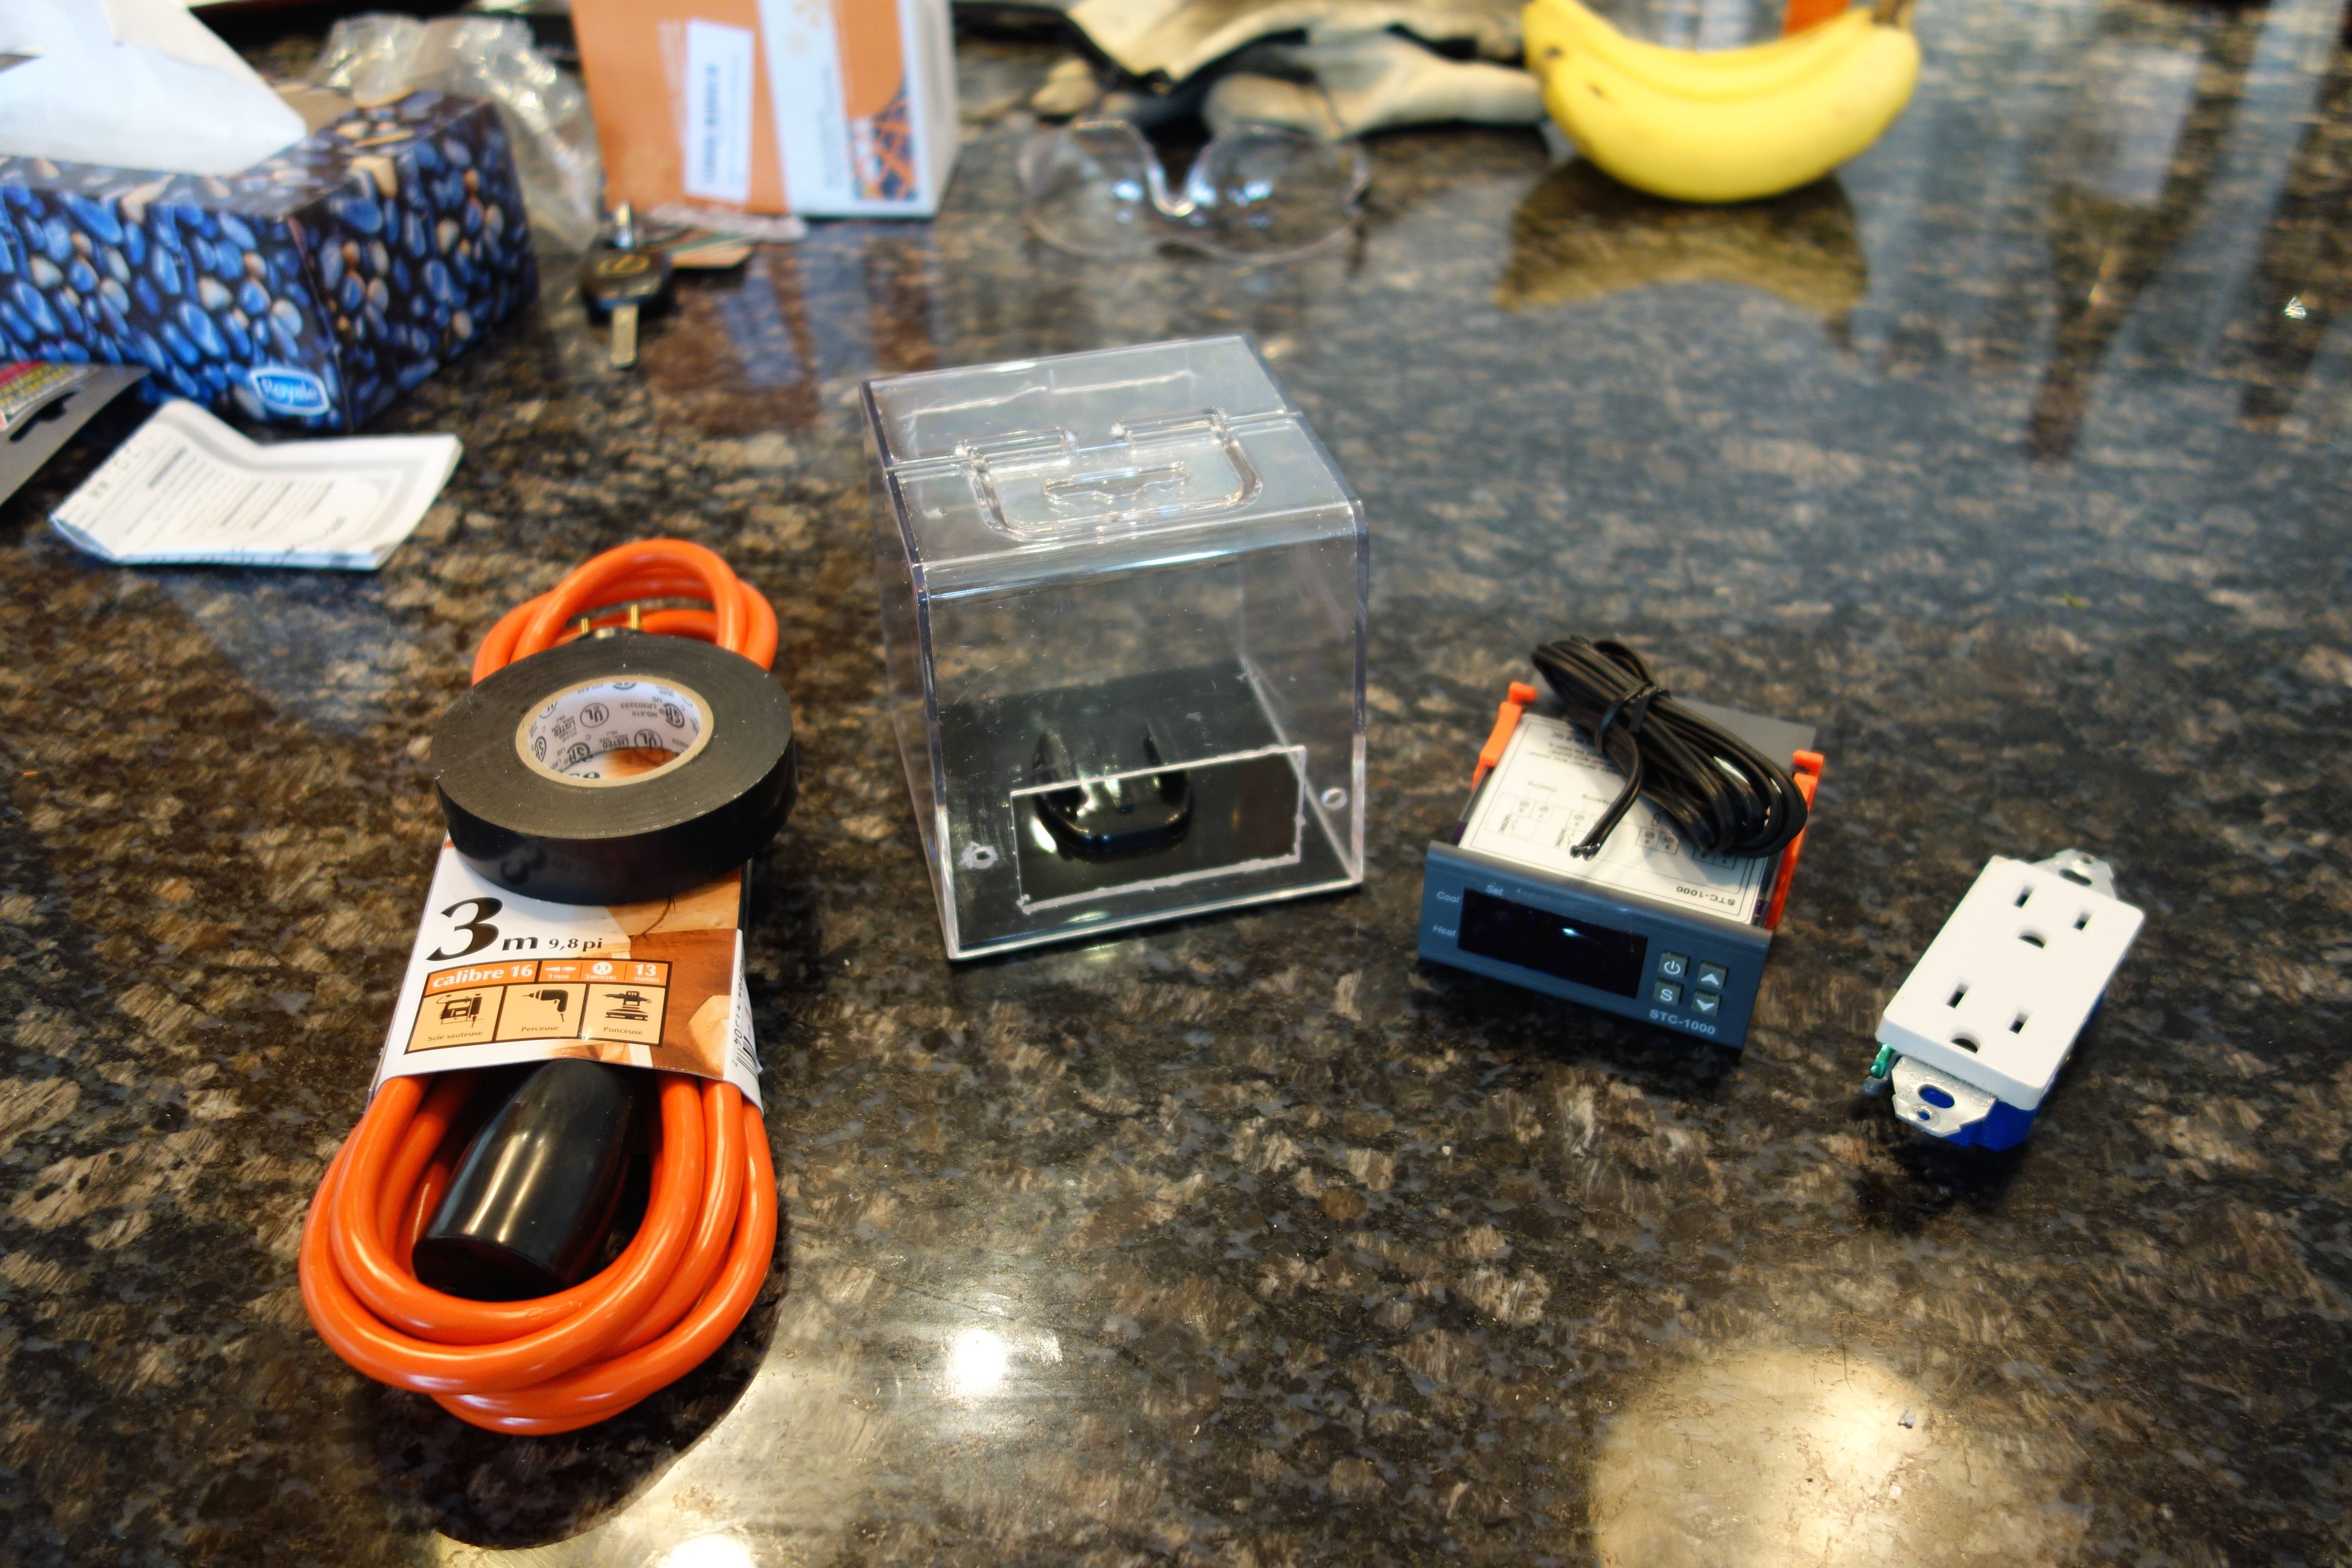
Once you’ve collected these bits the first and probably most difficult part of the whole project is cutting holes in the housing to fit the controller and power outlet. I had to drill a load of holes and then file down the holes for bloody ages to get them smooth. If you have access to a rotary tool though you’ll find things much easier. The other thing you’ll need to do is strip your cable down and cut some lengths of wire from it. If you plan on wiring both the cooling and heating loops from the controller (you may as well) you’ll need 5 lengths of ‘live’ wire and one length of ‘neutral’ (in Canada 5 black bits and 1 white).
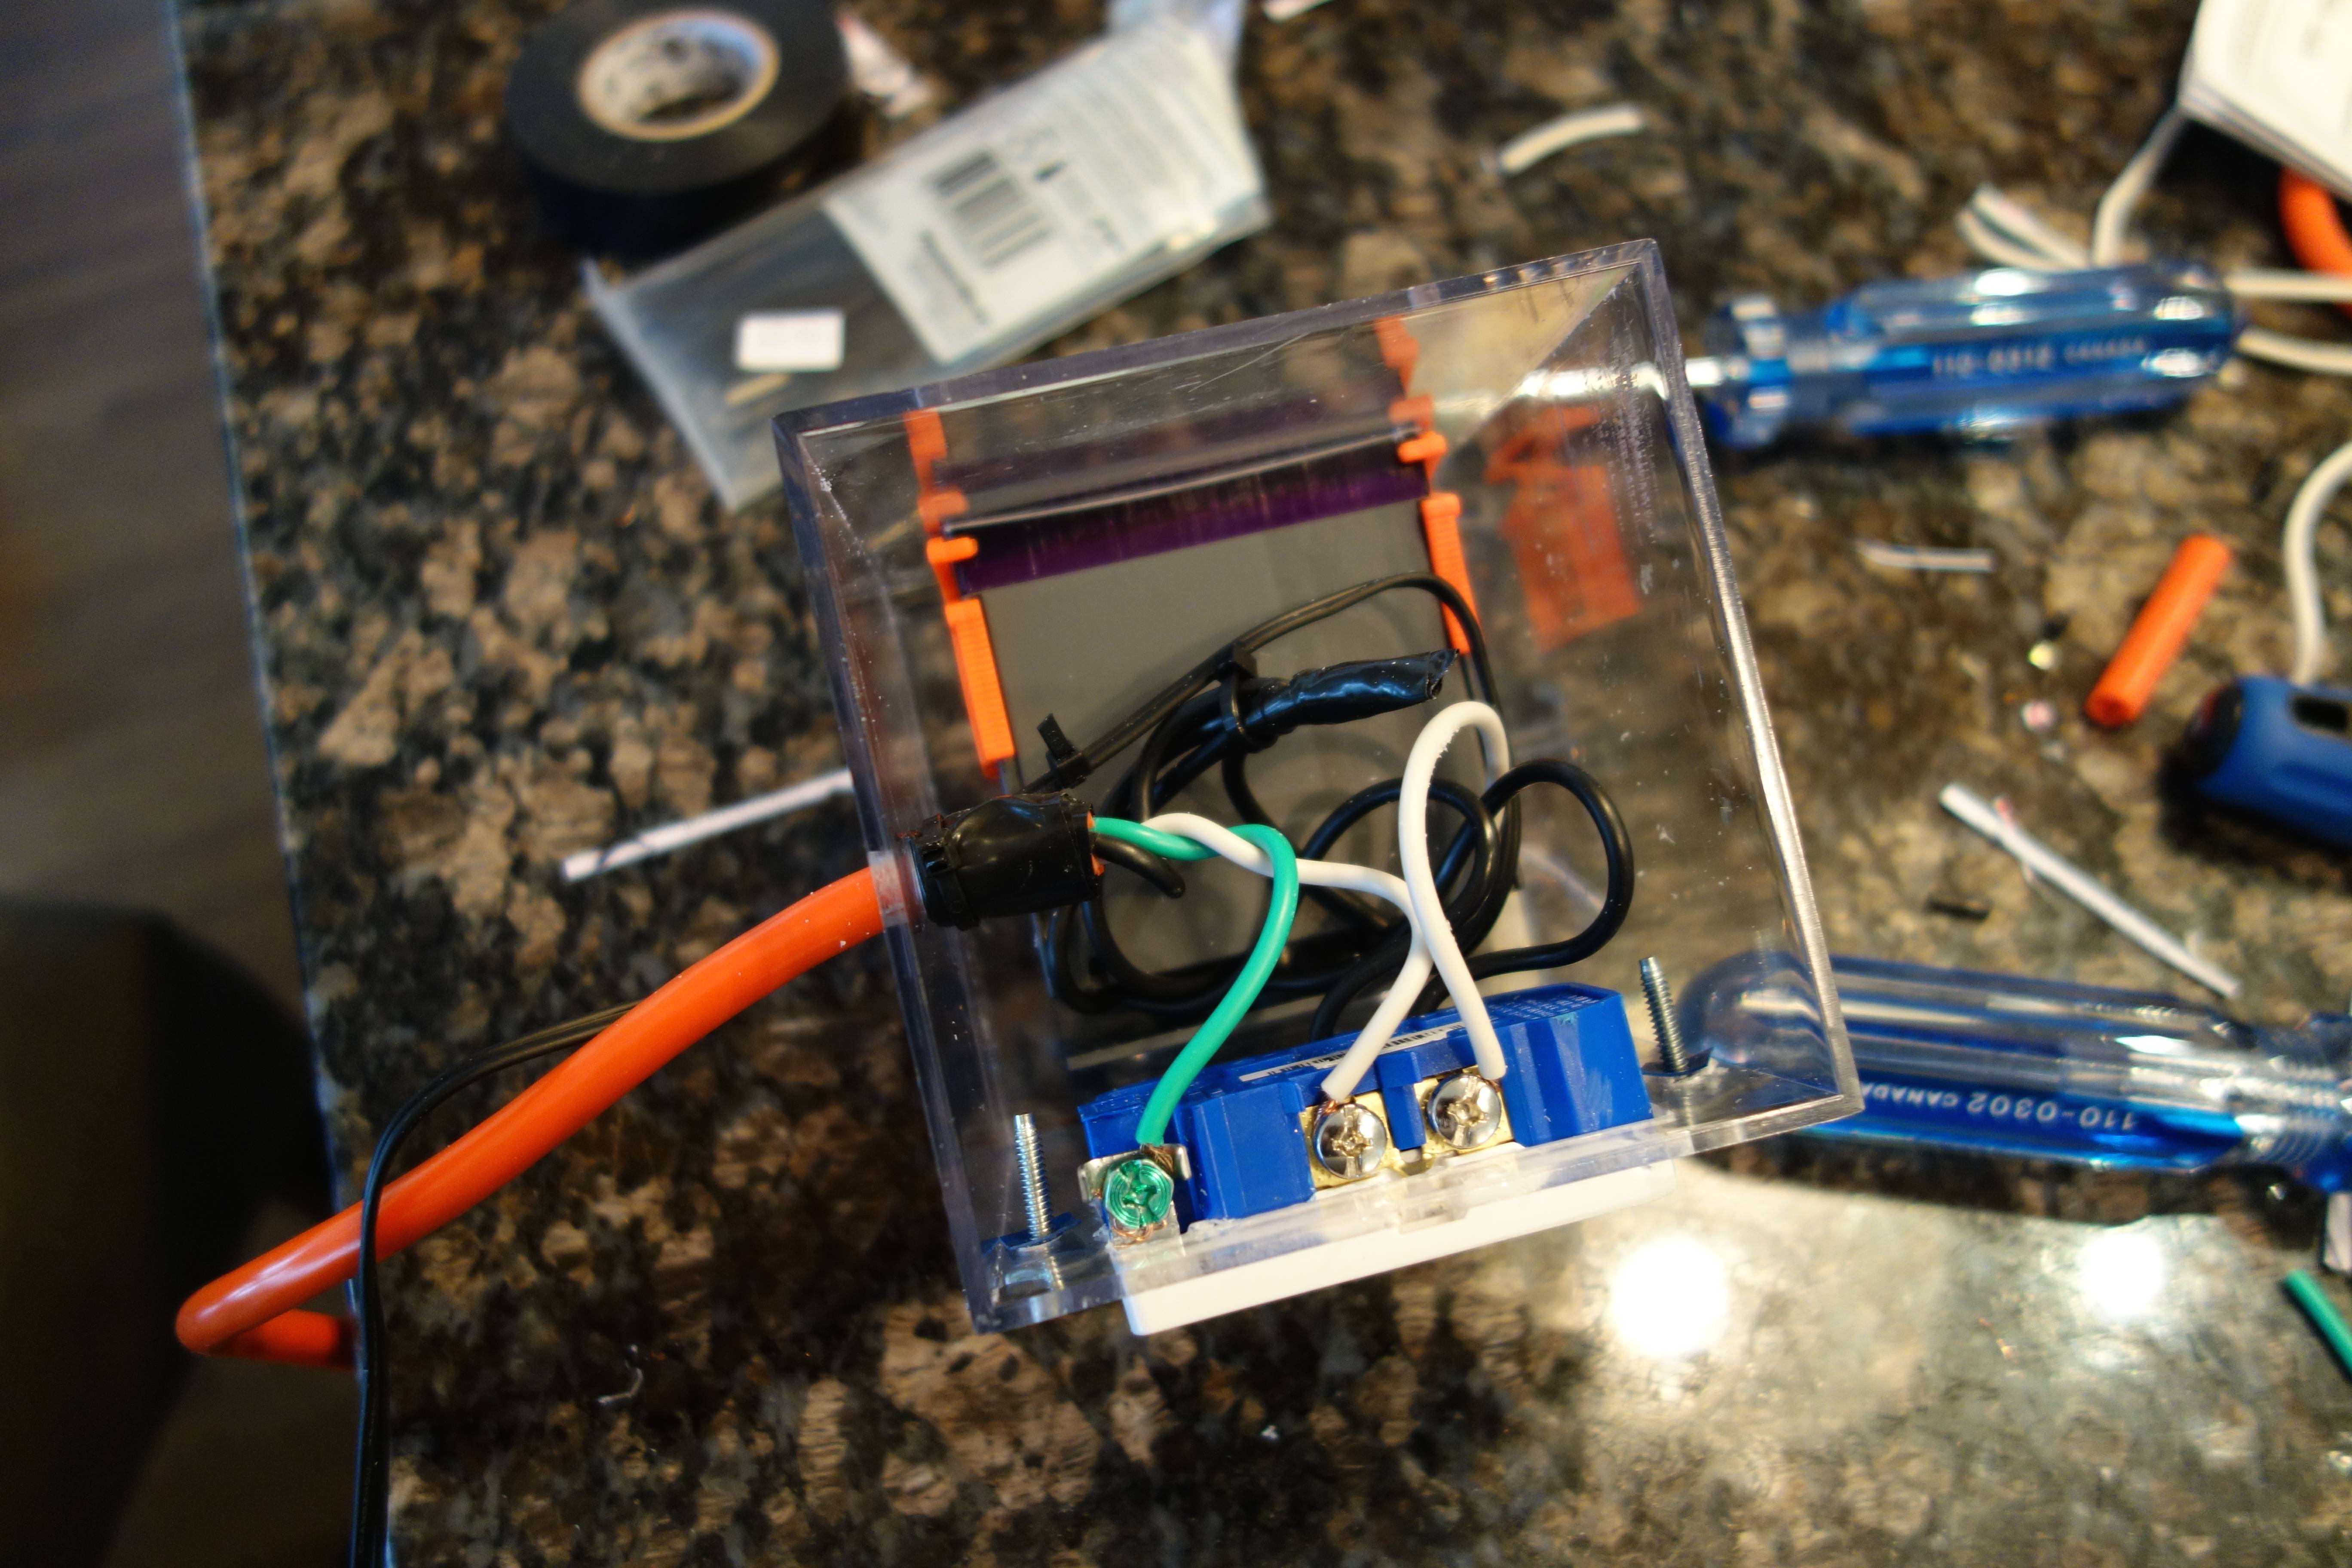
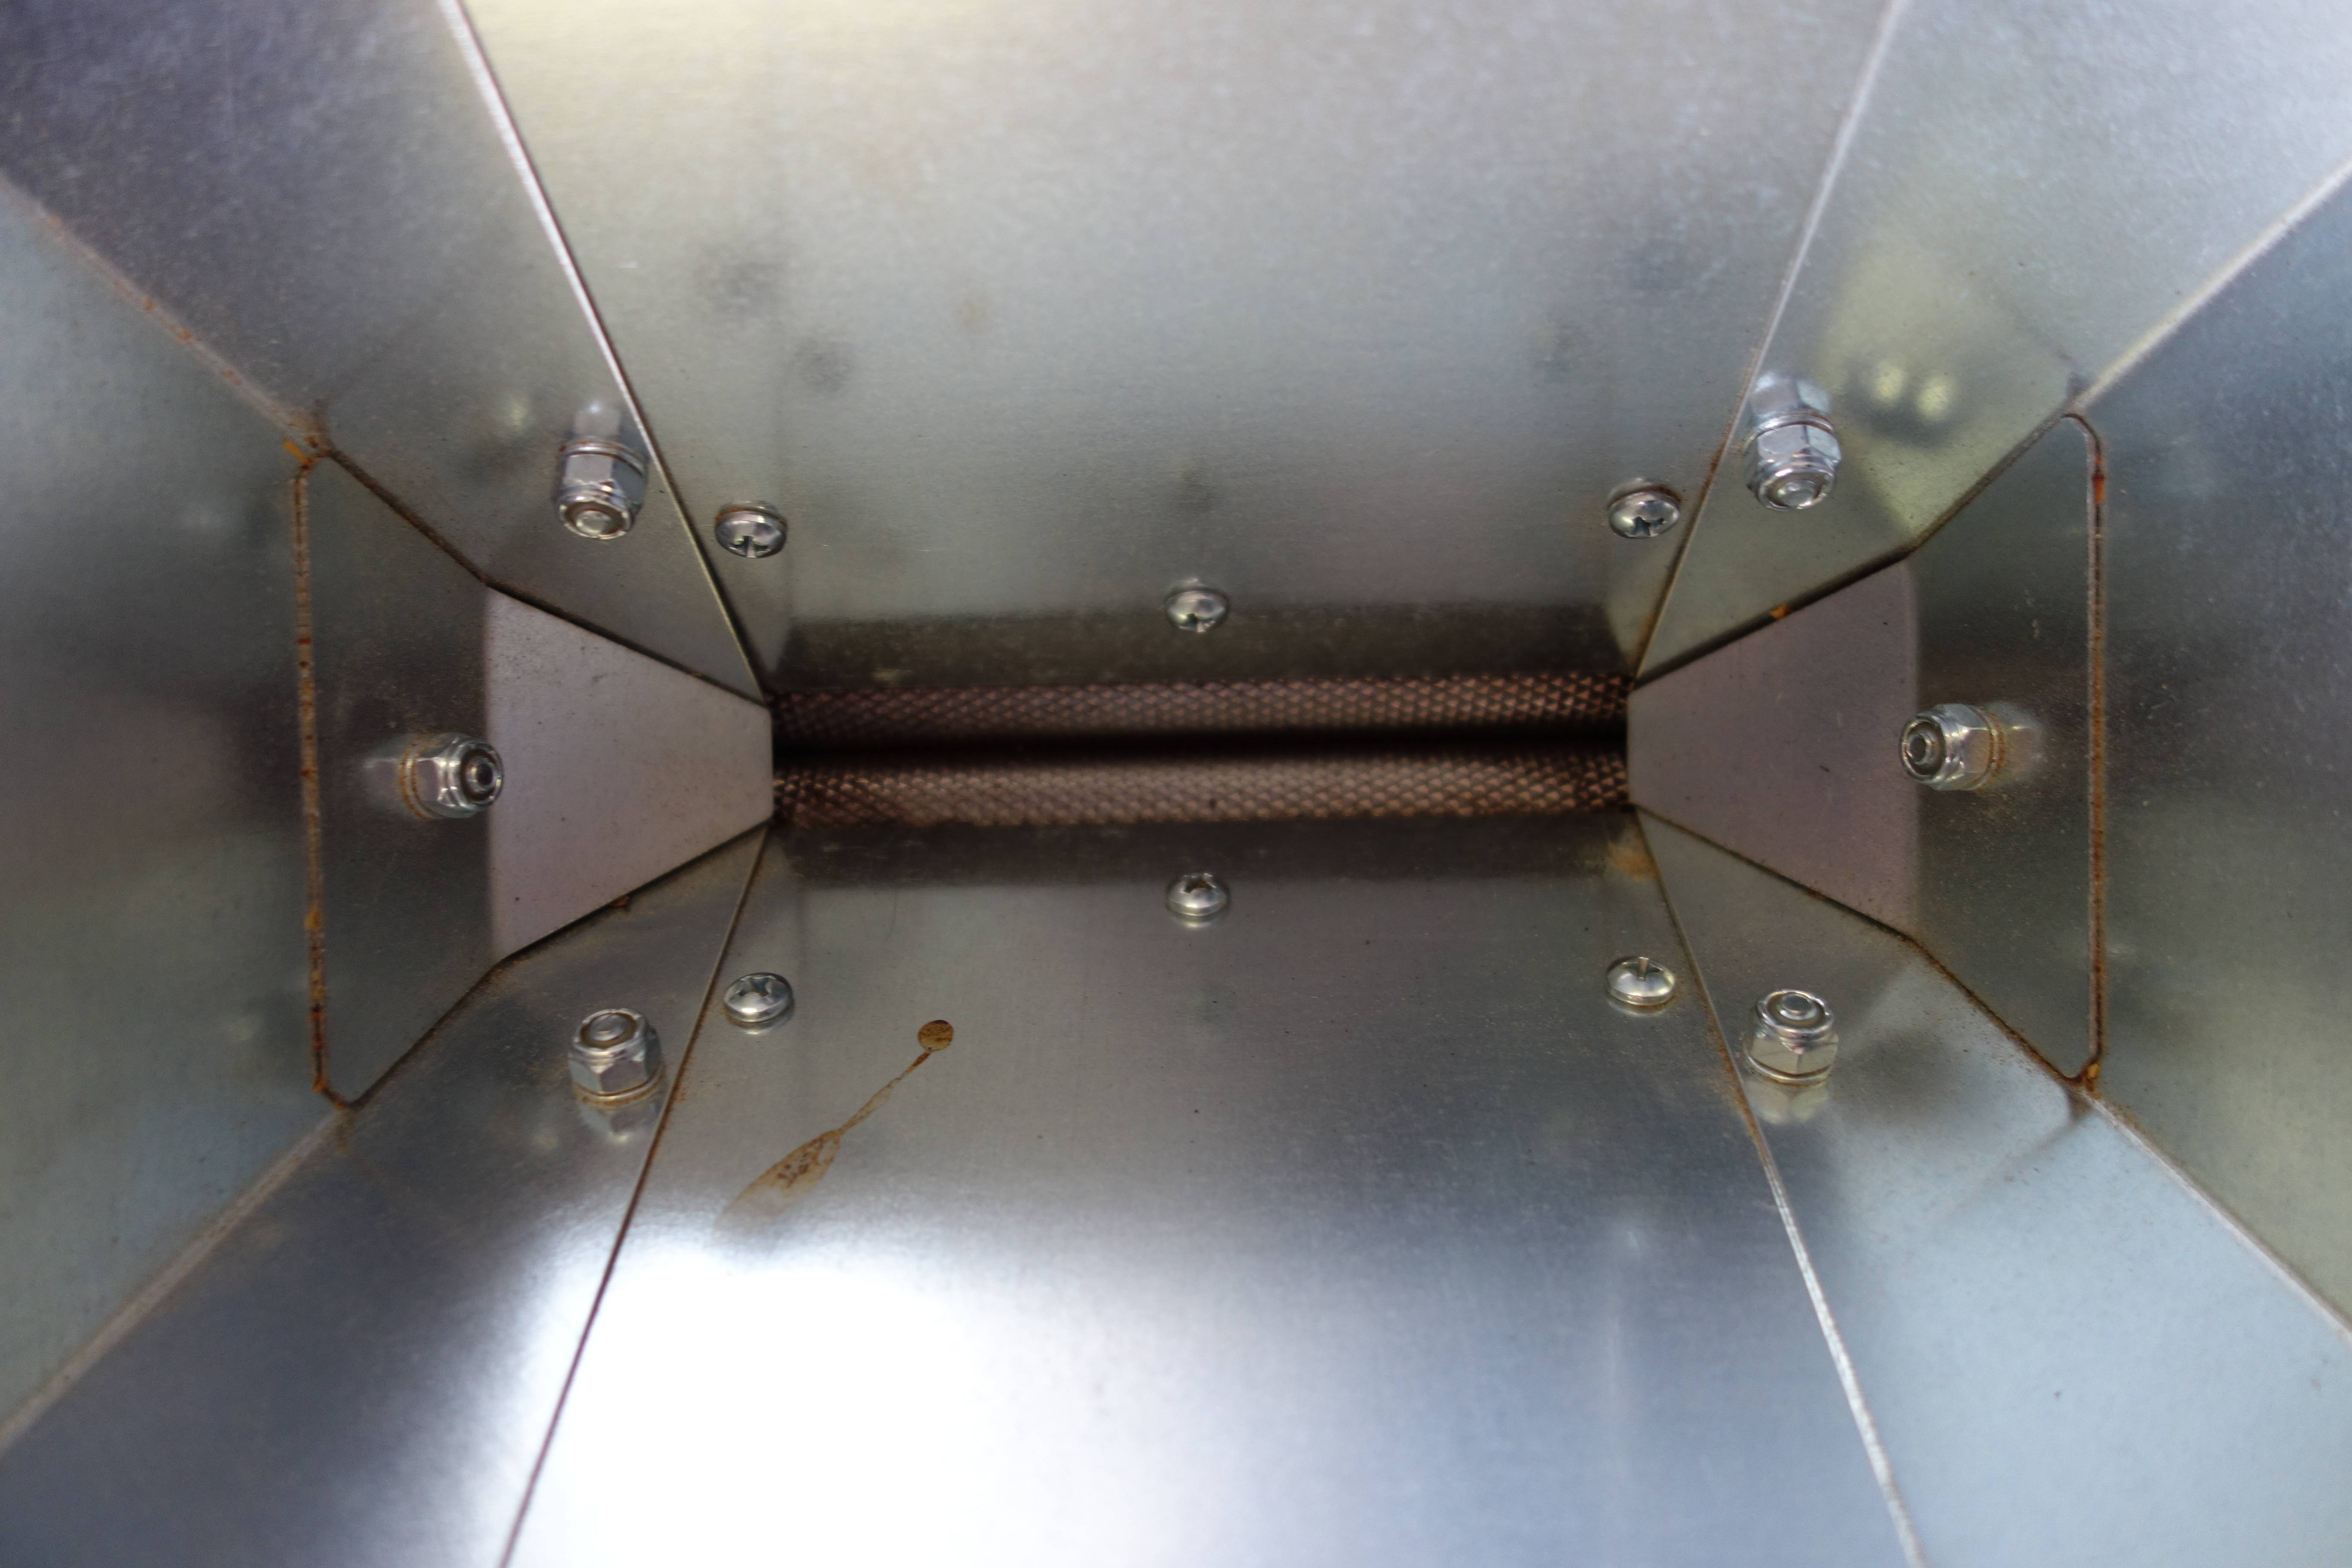
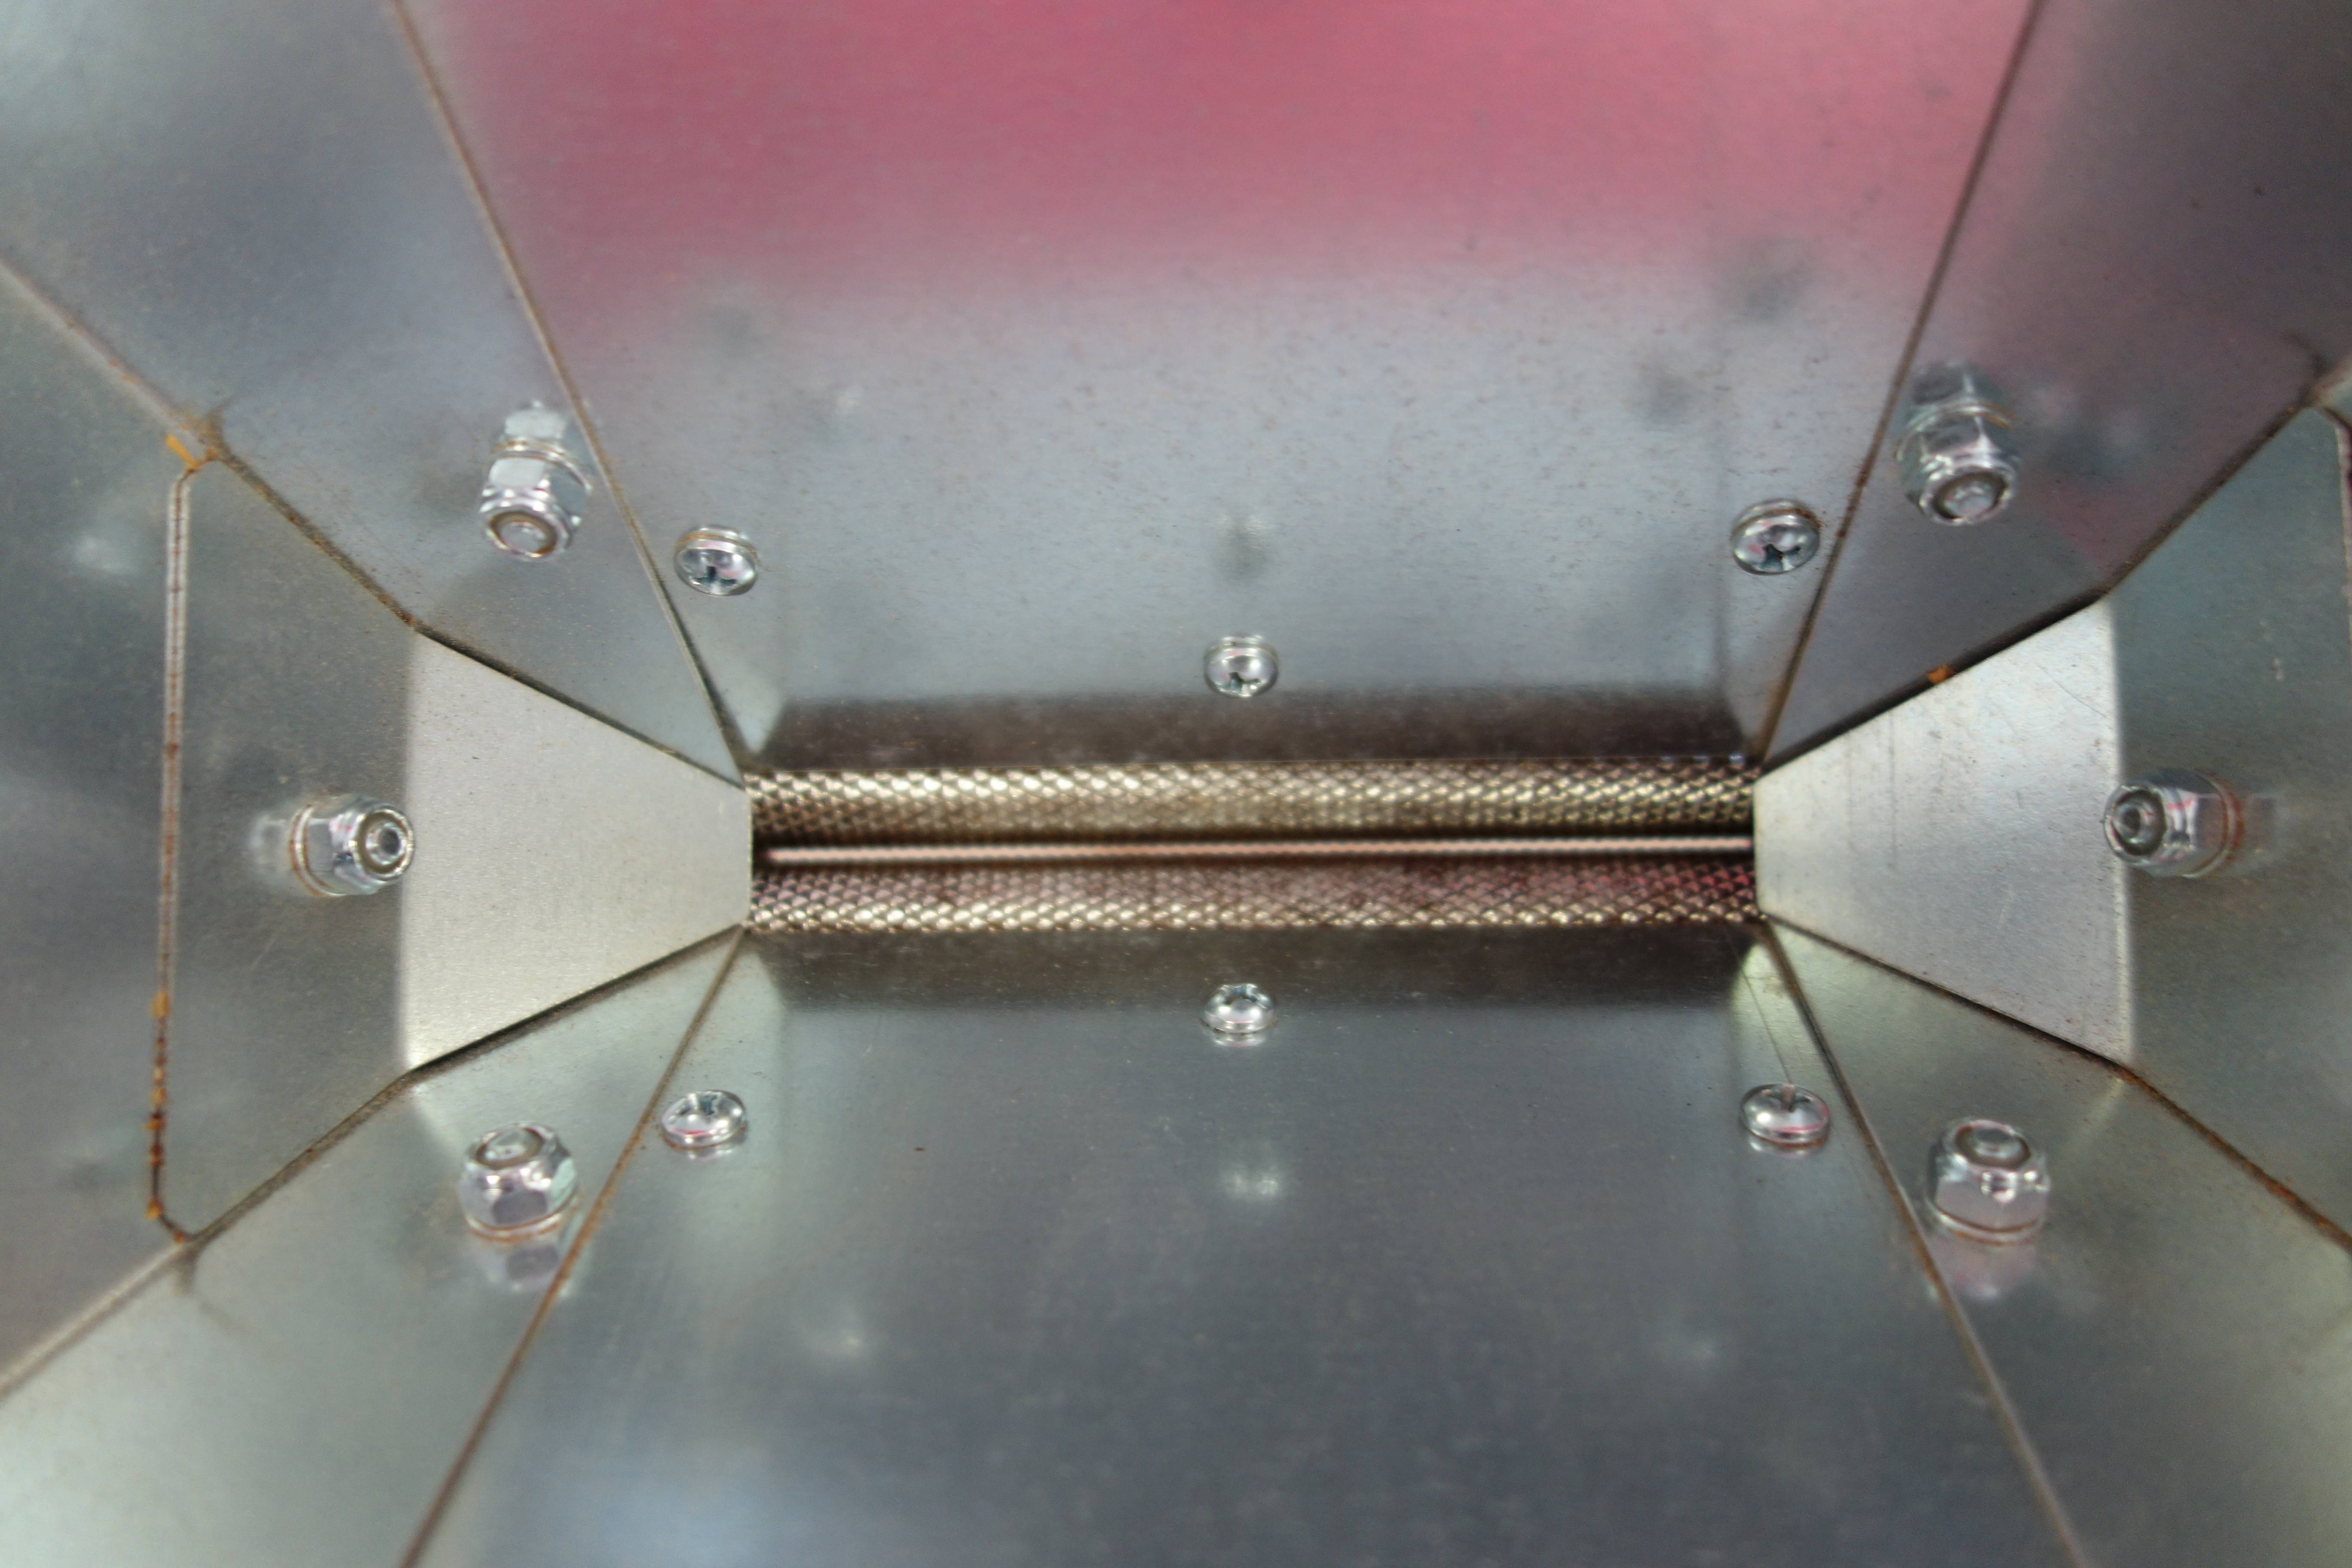
Again, I don’t want to give a step by step on the wiring, but the wiring diagram I used and lots of other useful stuff can be found at the Mostly Harmless Brewing blog, and there’s tonnes of other STC-1000 how-to’s. Here’s a few pictures of mine going together though:
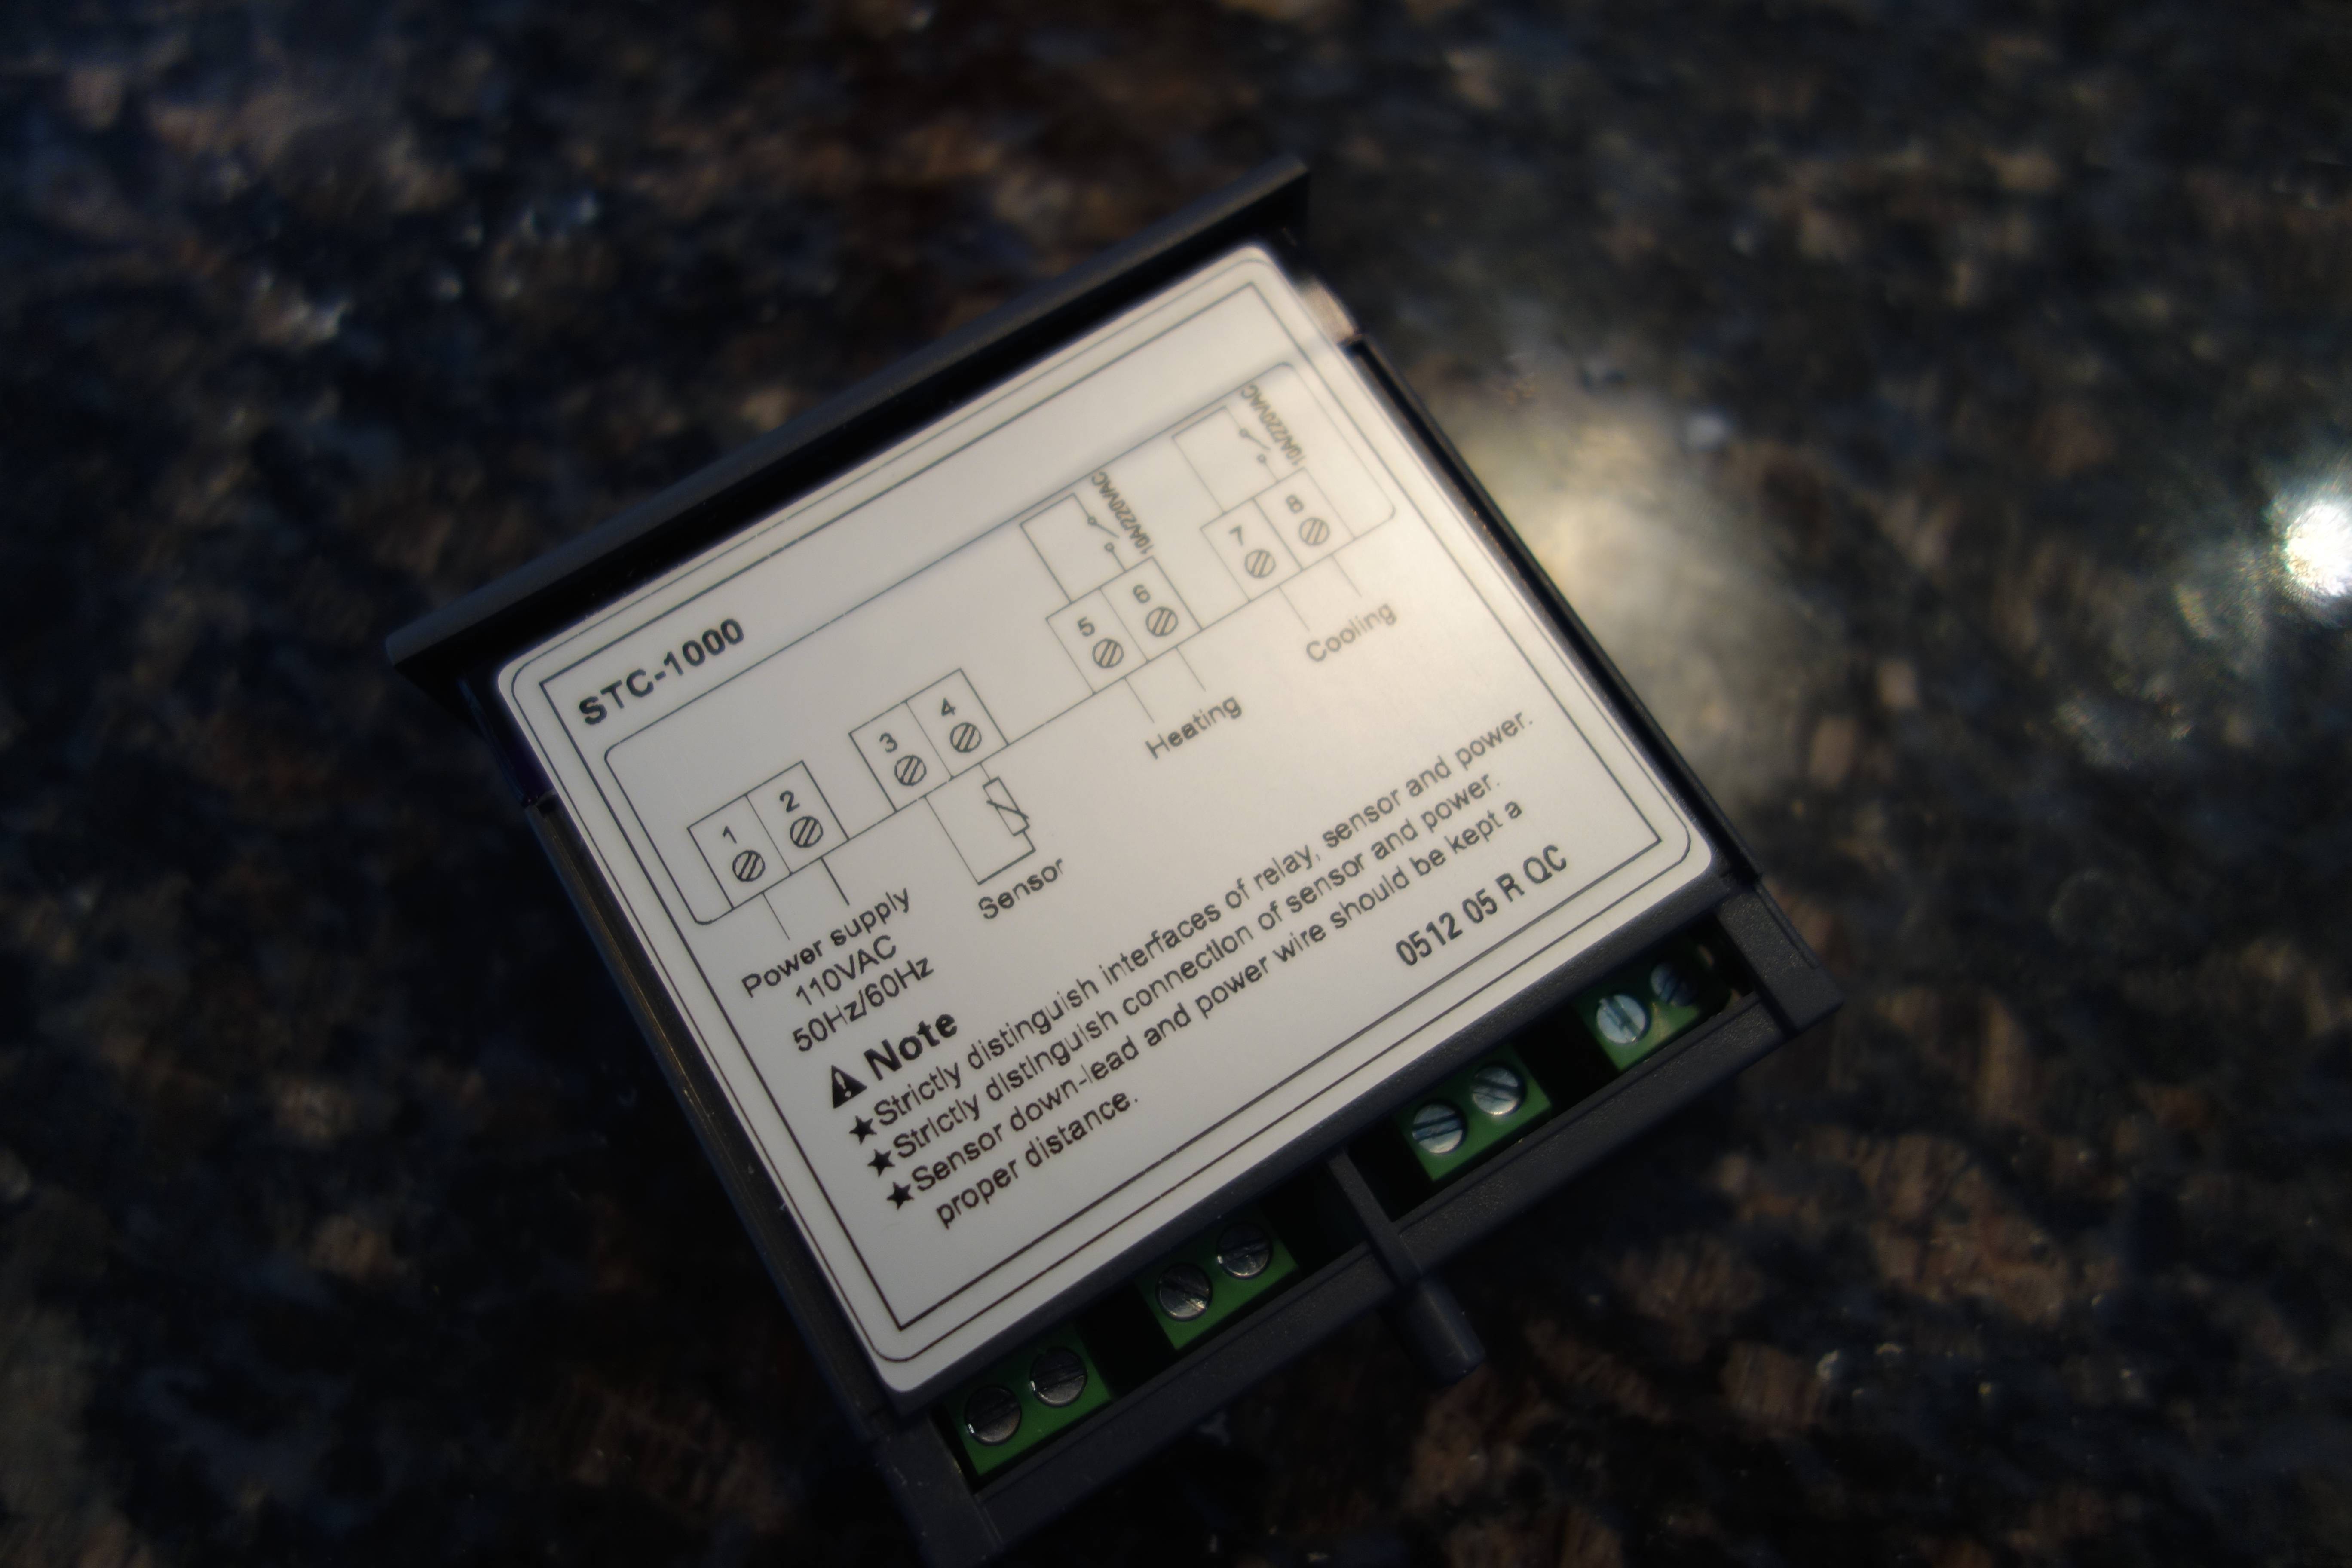
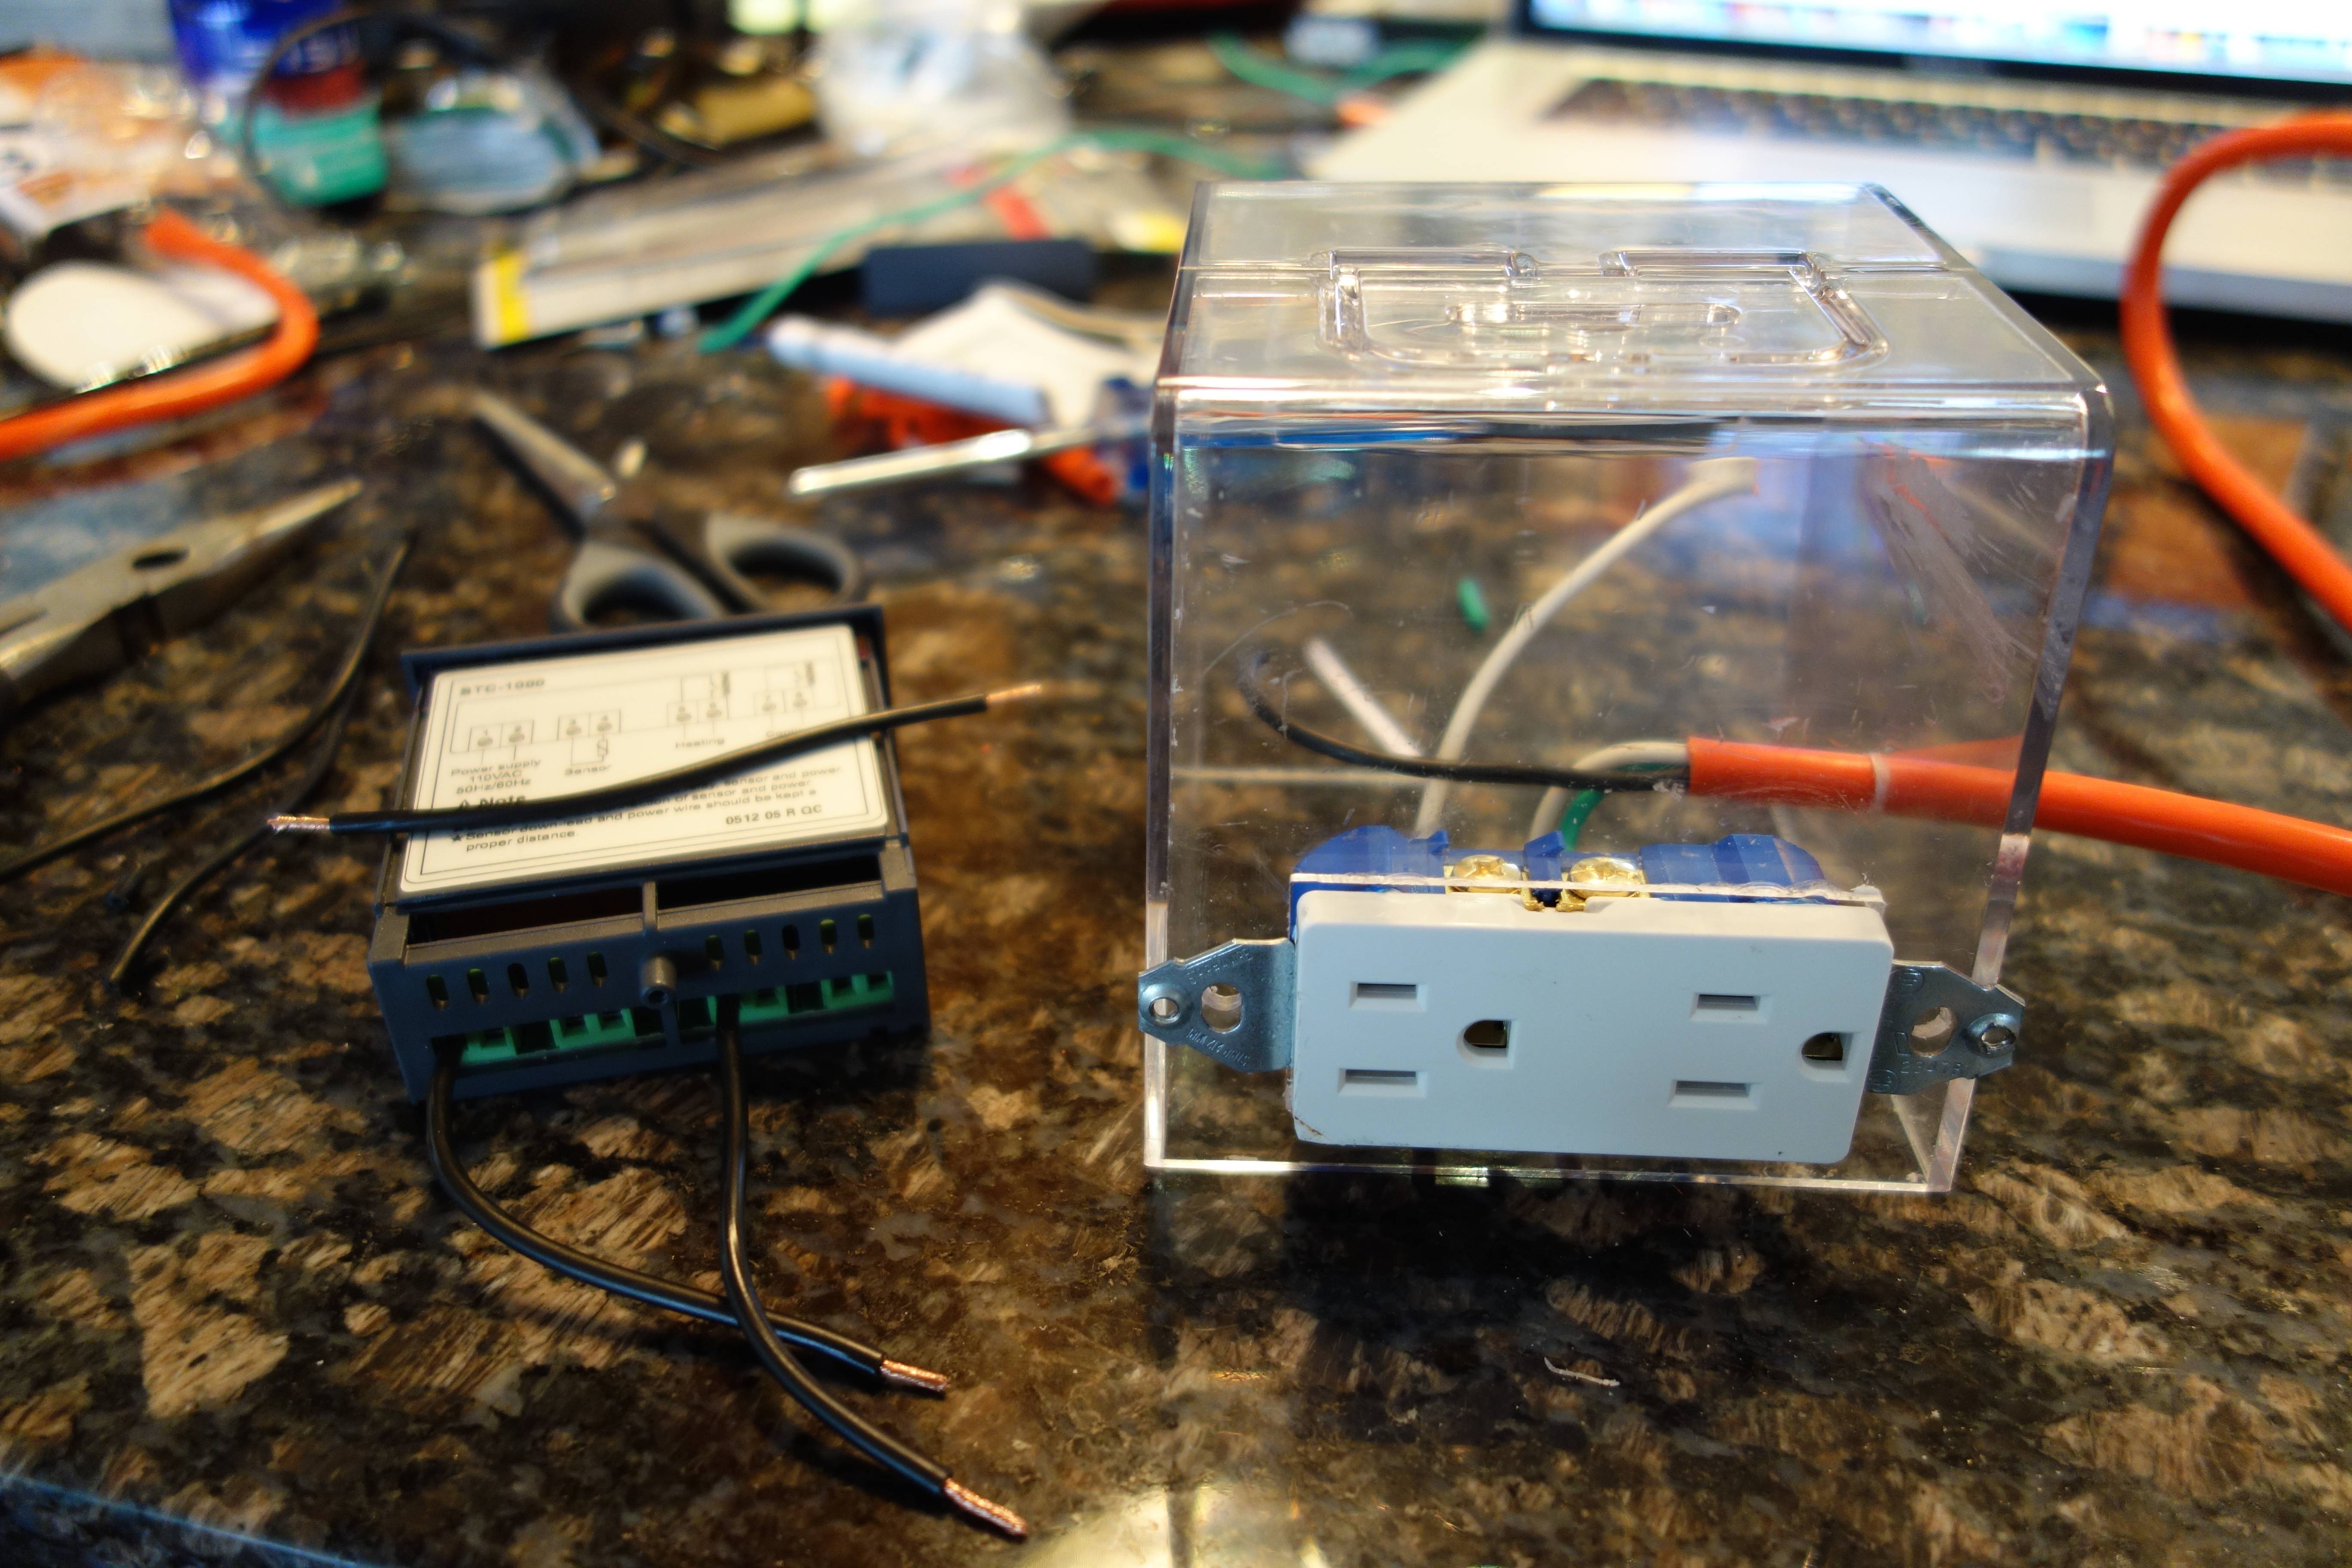
One piece of advice that I didn’t read anywhere is that you’ll need a really thin flat-head screwdriver to tighten the contact screws on the controller itself (above left), or else they are really hard to access and your wires will end up falling out all the time.
Once that’s done you’ll end up with a controller with two output relays, one for cooling and one for heating. The device works by measuring temperature with a probe and sending power to either the heating or cooling outputs depending on whether its reading is above or below the set-point you choose. You can also set a differential and delay on the unit so that it doesn’t turn on and off with every fraction of a degree change and wear the compressor of your fridge/freezer out. It’s also worth mentioning that you don’t have to connect both a heater and cooler- I only use my cooling loop, but may have to use the heating loop attached to a brew belt or lamp when it gets very cold in the winter.
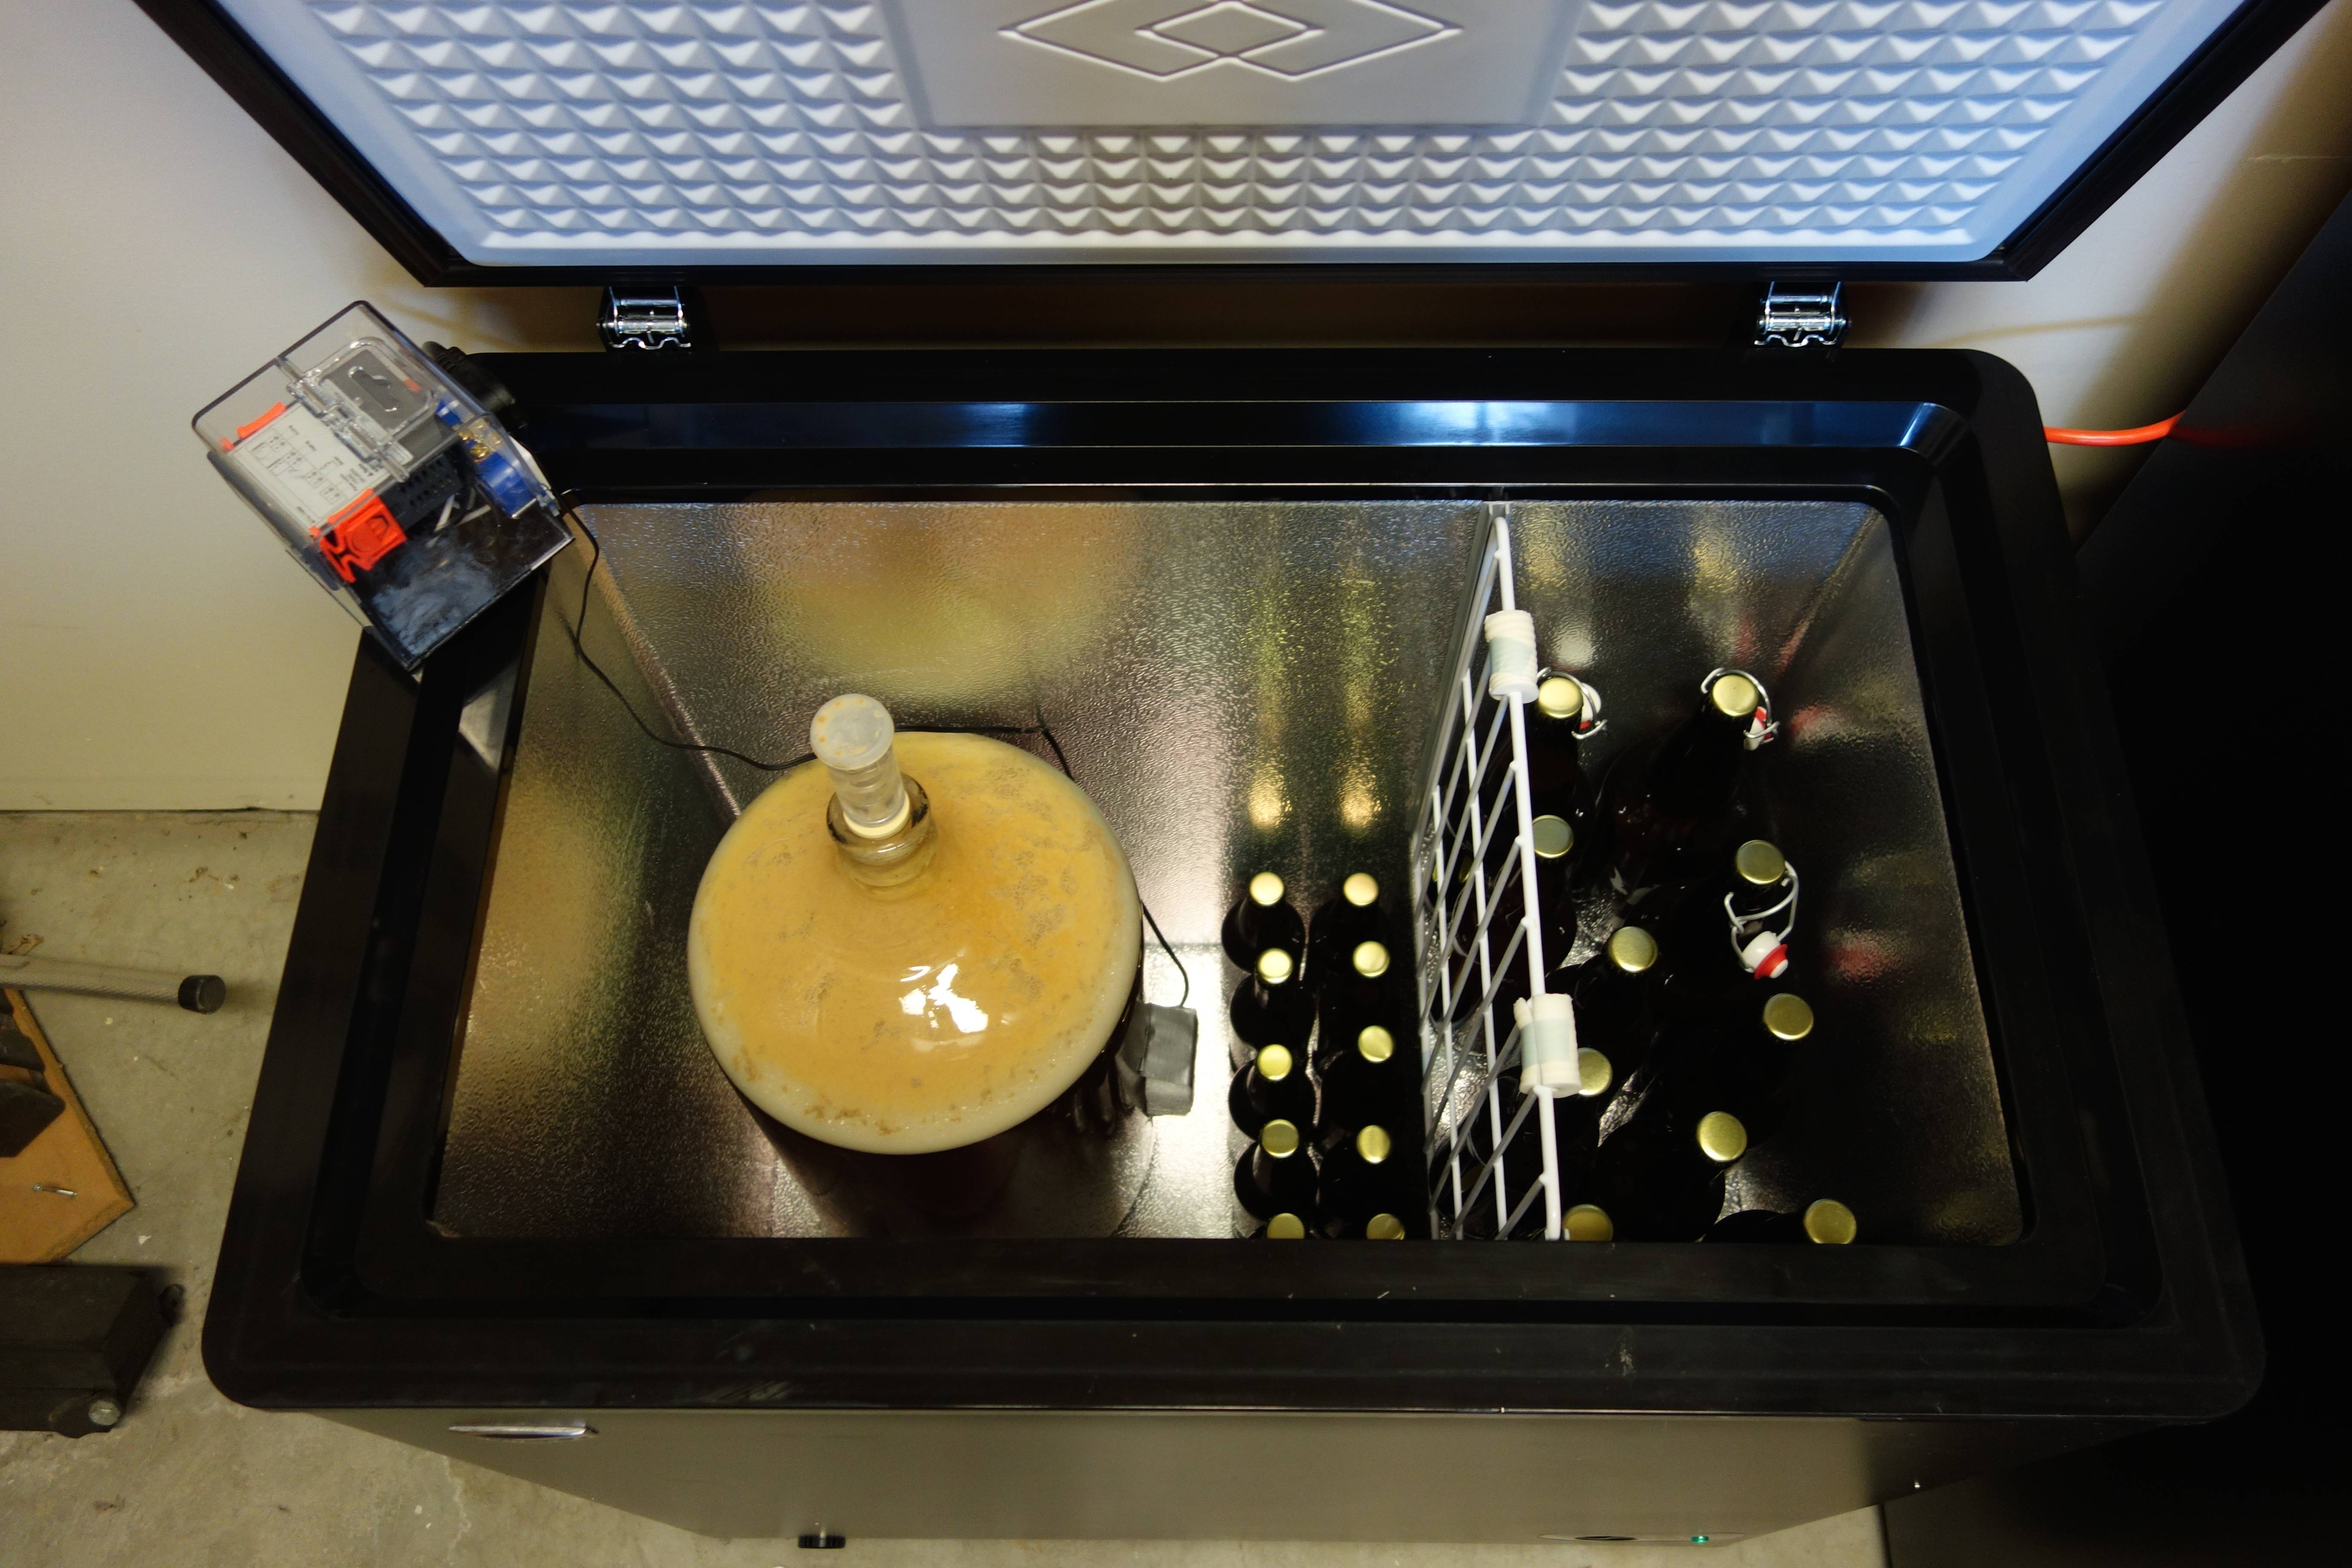
I mentioned I bought a freezer. Again, this project will work with pretty much anything, but for various reasons (mainly space) I picked up a 5.5 Cu ft. freezer from Home Depot, which cost $250, about £130. This will only fit one fermenting carboy without adaptation (or 2 standard and 2 small corny kegs), but I’m unlikely to be fermenting more than that at any given time or want a bigger kegerator. You might want to look at the 7.2 version, which is $50 more but fits twice as much. You may also want to look at upright freezers, which cost more but take up a bit less room and are easier to get stuff in and out of. Again, you may just want to use the busted up fridge already in your garage.
Anyway I’ve put some pictures below of the final project, which is keeping an IPA I just brewed happy at about 15ºC. The real test will come in a week or so when I crash cool to 1-2º. It doubles quite well as an overflow beer fridge too, so I’ve got the remainder of the SMaSH brew I did a few weeks ago waiting to cool down too. In other words, I may not be too far away from that park bench at 10 o’clock on a Tuesday morning, but by the Gods the beer will be glorious when I get there.
Smash!
Some crazy people seem to have taken this idea even further, into total cold turkey territory. The result of this is SMaSH, or Single Malt and Single Hop, which sort of does what it says on the tin. Rather than picking from a massive list of ingredients, the SMaSH brewer can only choose three- one malt, one hop variety and one yeast strain. This can be a really interesting experiment for three reasons. Firstly, because you can drink a SMaSH beer and pretty accurately tell the flavour of each of those three ingredients. Secondly, because you could take those same ingredients and make very different beers depending on process variables like boil length and fermentation temperature. And thirdly, because it’s called SMaSH! Anyway, I was planning my next brew a few weeks ago and decided I had to have a go. My nominated ingredients: Canadian 2 row pale malt, Cascade hops and SafAle 04 British ale yeast.
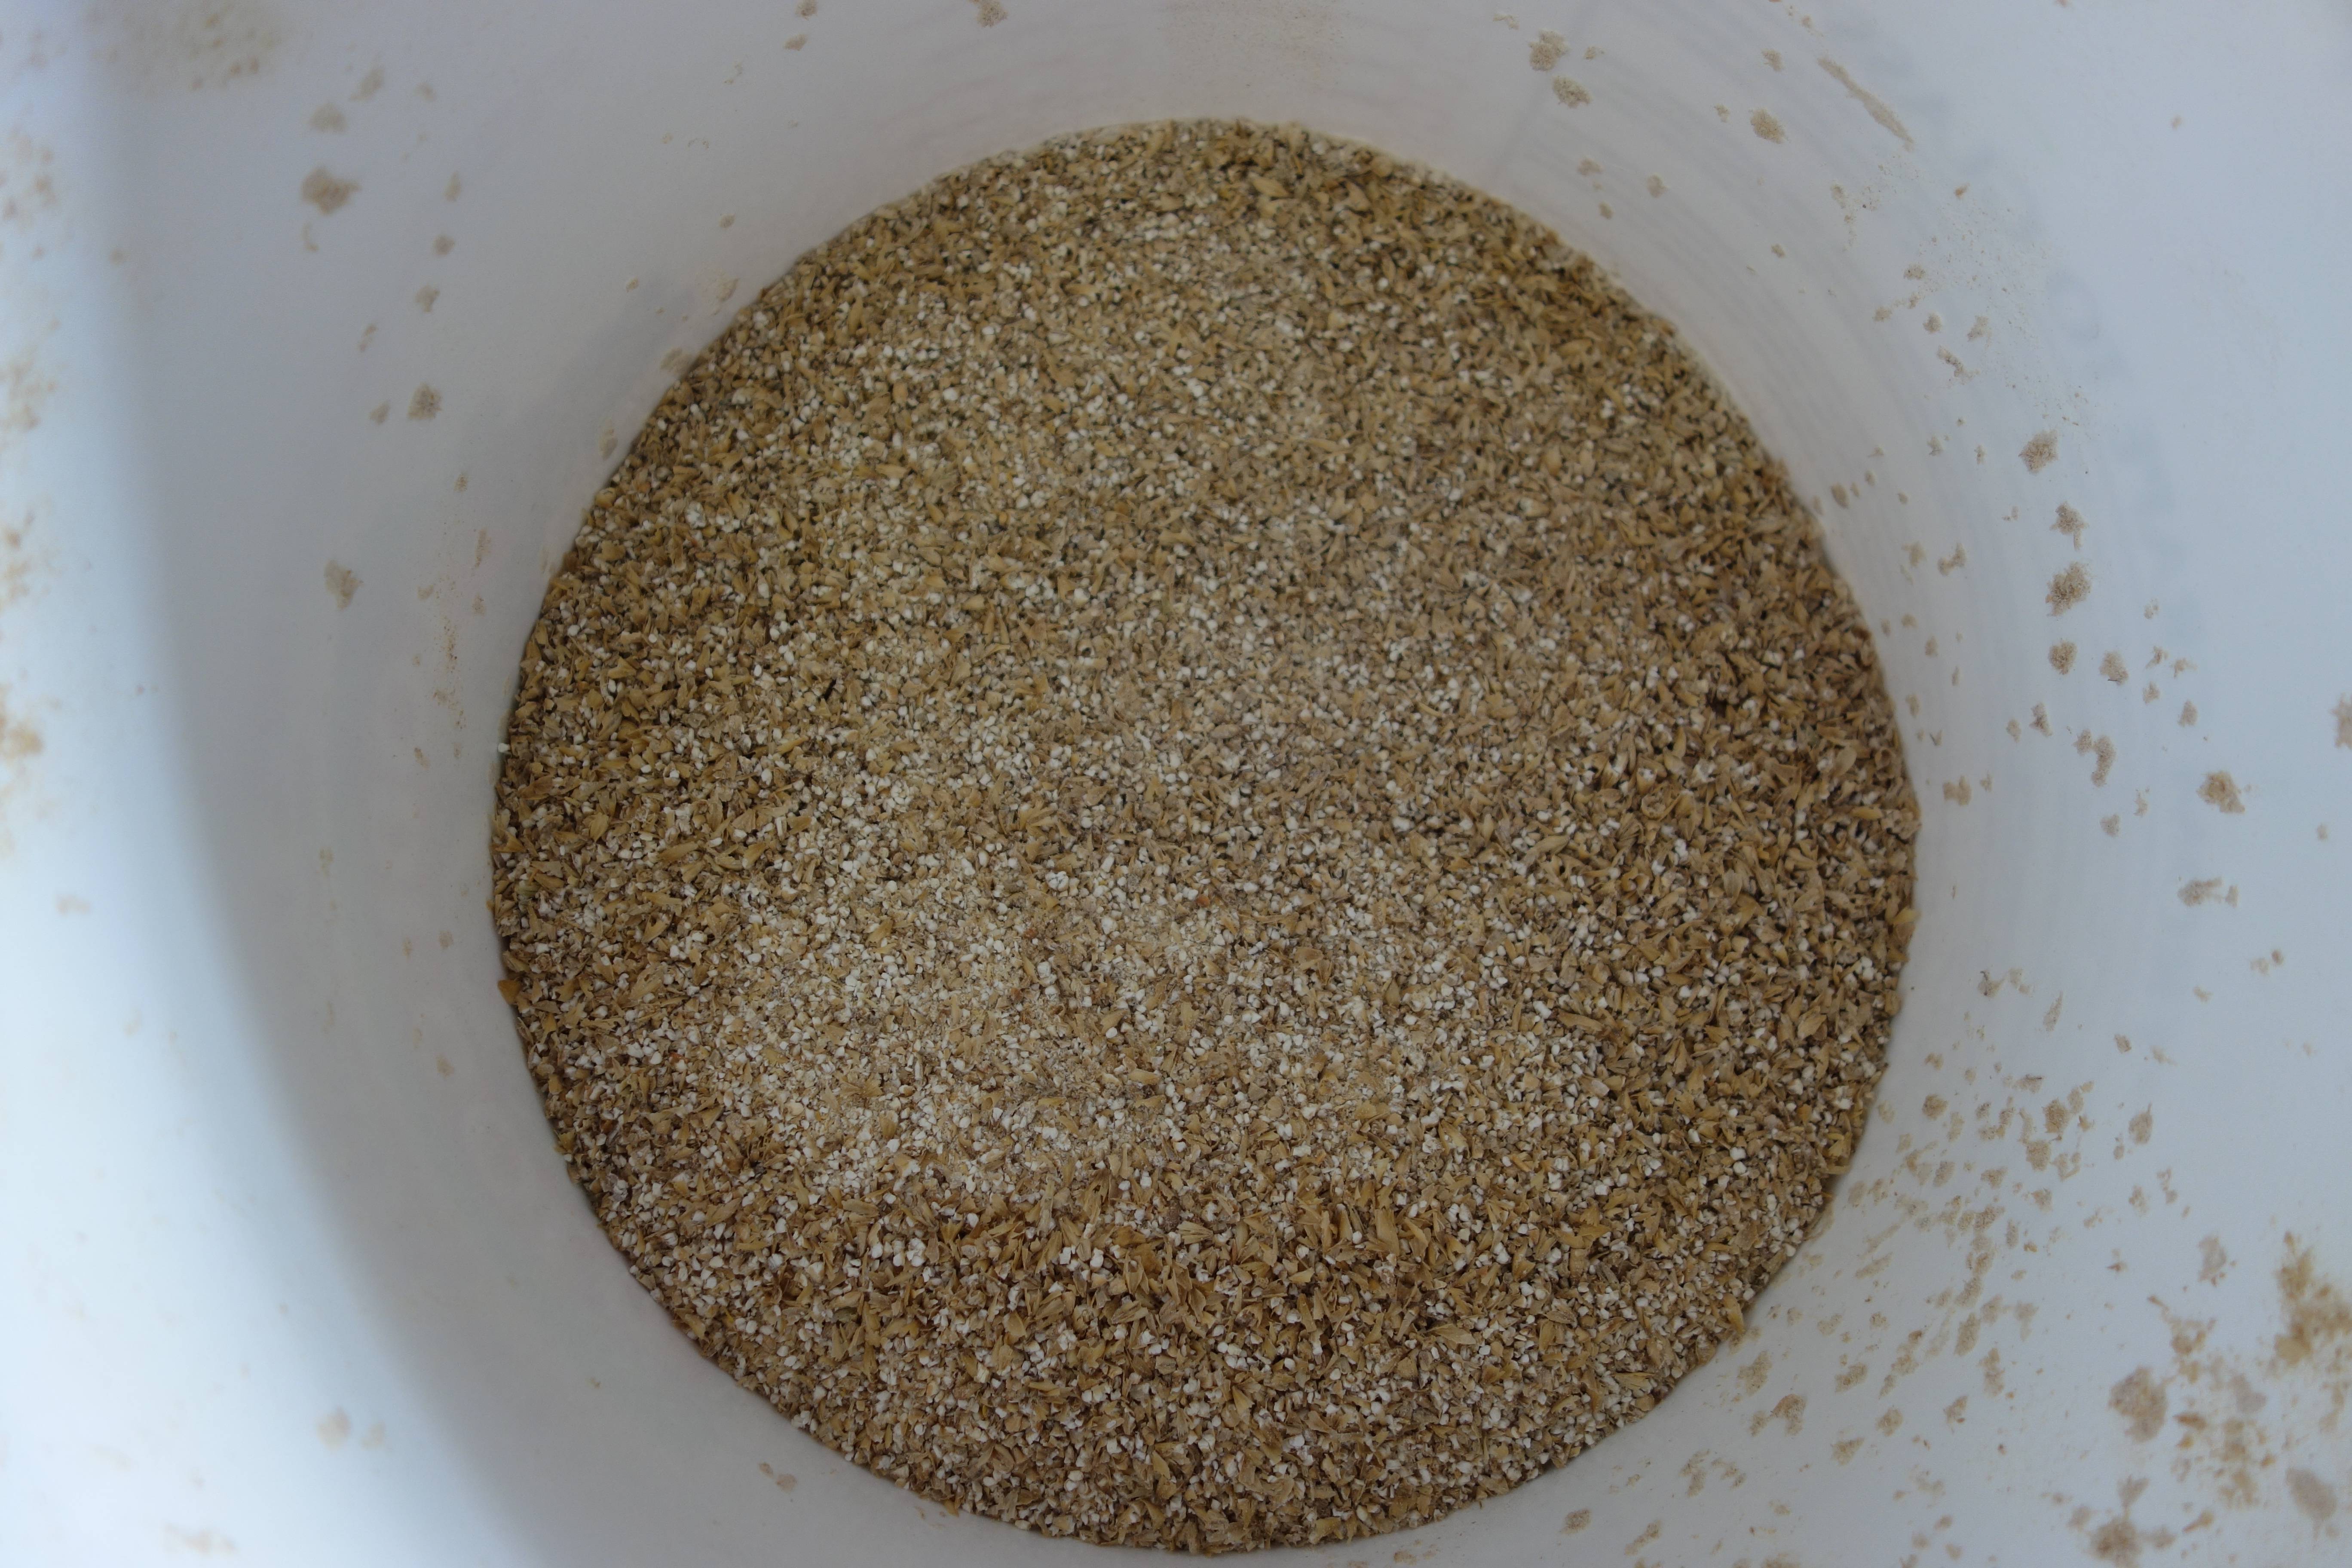
First things first though, I had a few issues to address from my last, less than successful, brew day. The biggest problem seemed to come from an overly fine grain crush, so I reset the rollers on my mill using a credit card to set the gap. I read that on a forum somewhere. The manual says something about feeler gauges and deadly accuracy, but I didn’t have any gauges, and the card trick seemed to do the job. Before and after:
So yeah, I’d recommend the credit card trick, which is pretty much as it sounds. I actually used my Ikea family card. You set the space at each end of the rollers, which gives at least a visually accurate spacing across the unit. This gave a crush which looked as it should- no massive bits of white endosperm, but also a relatively intact husk content.
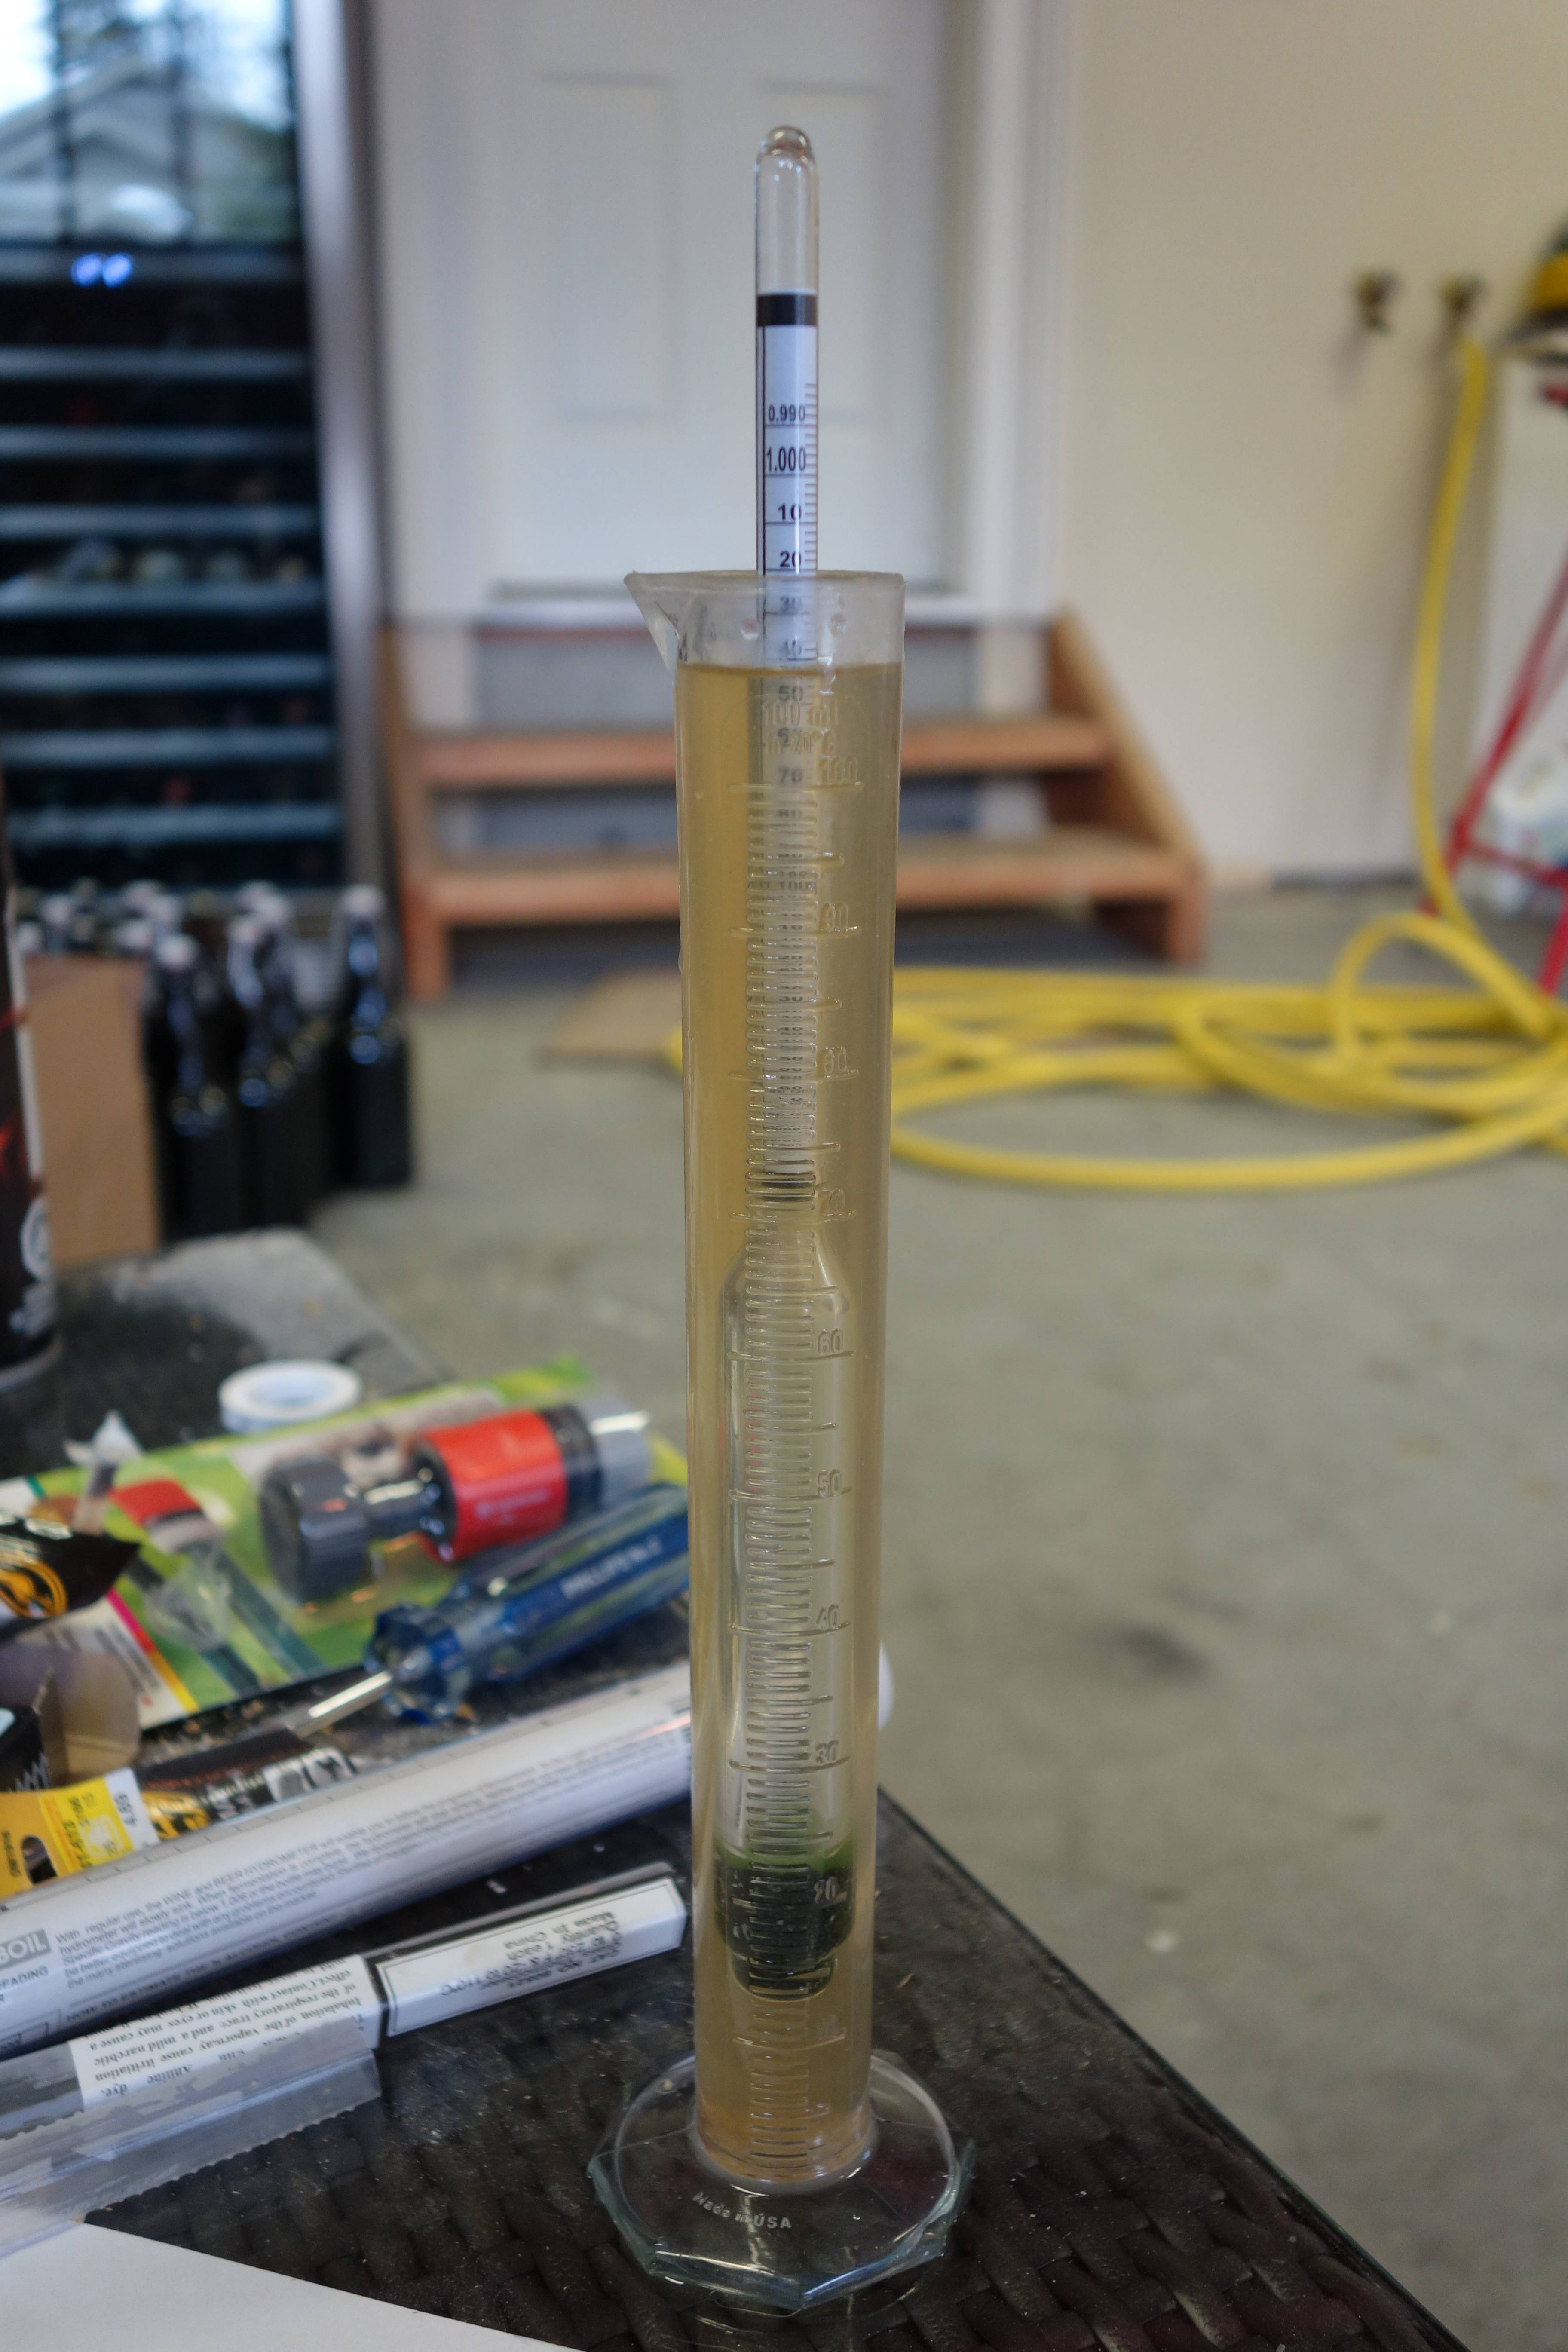
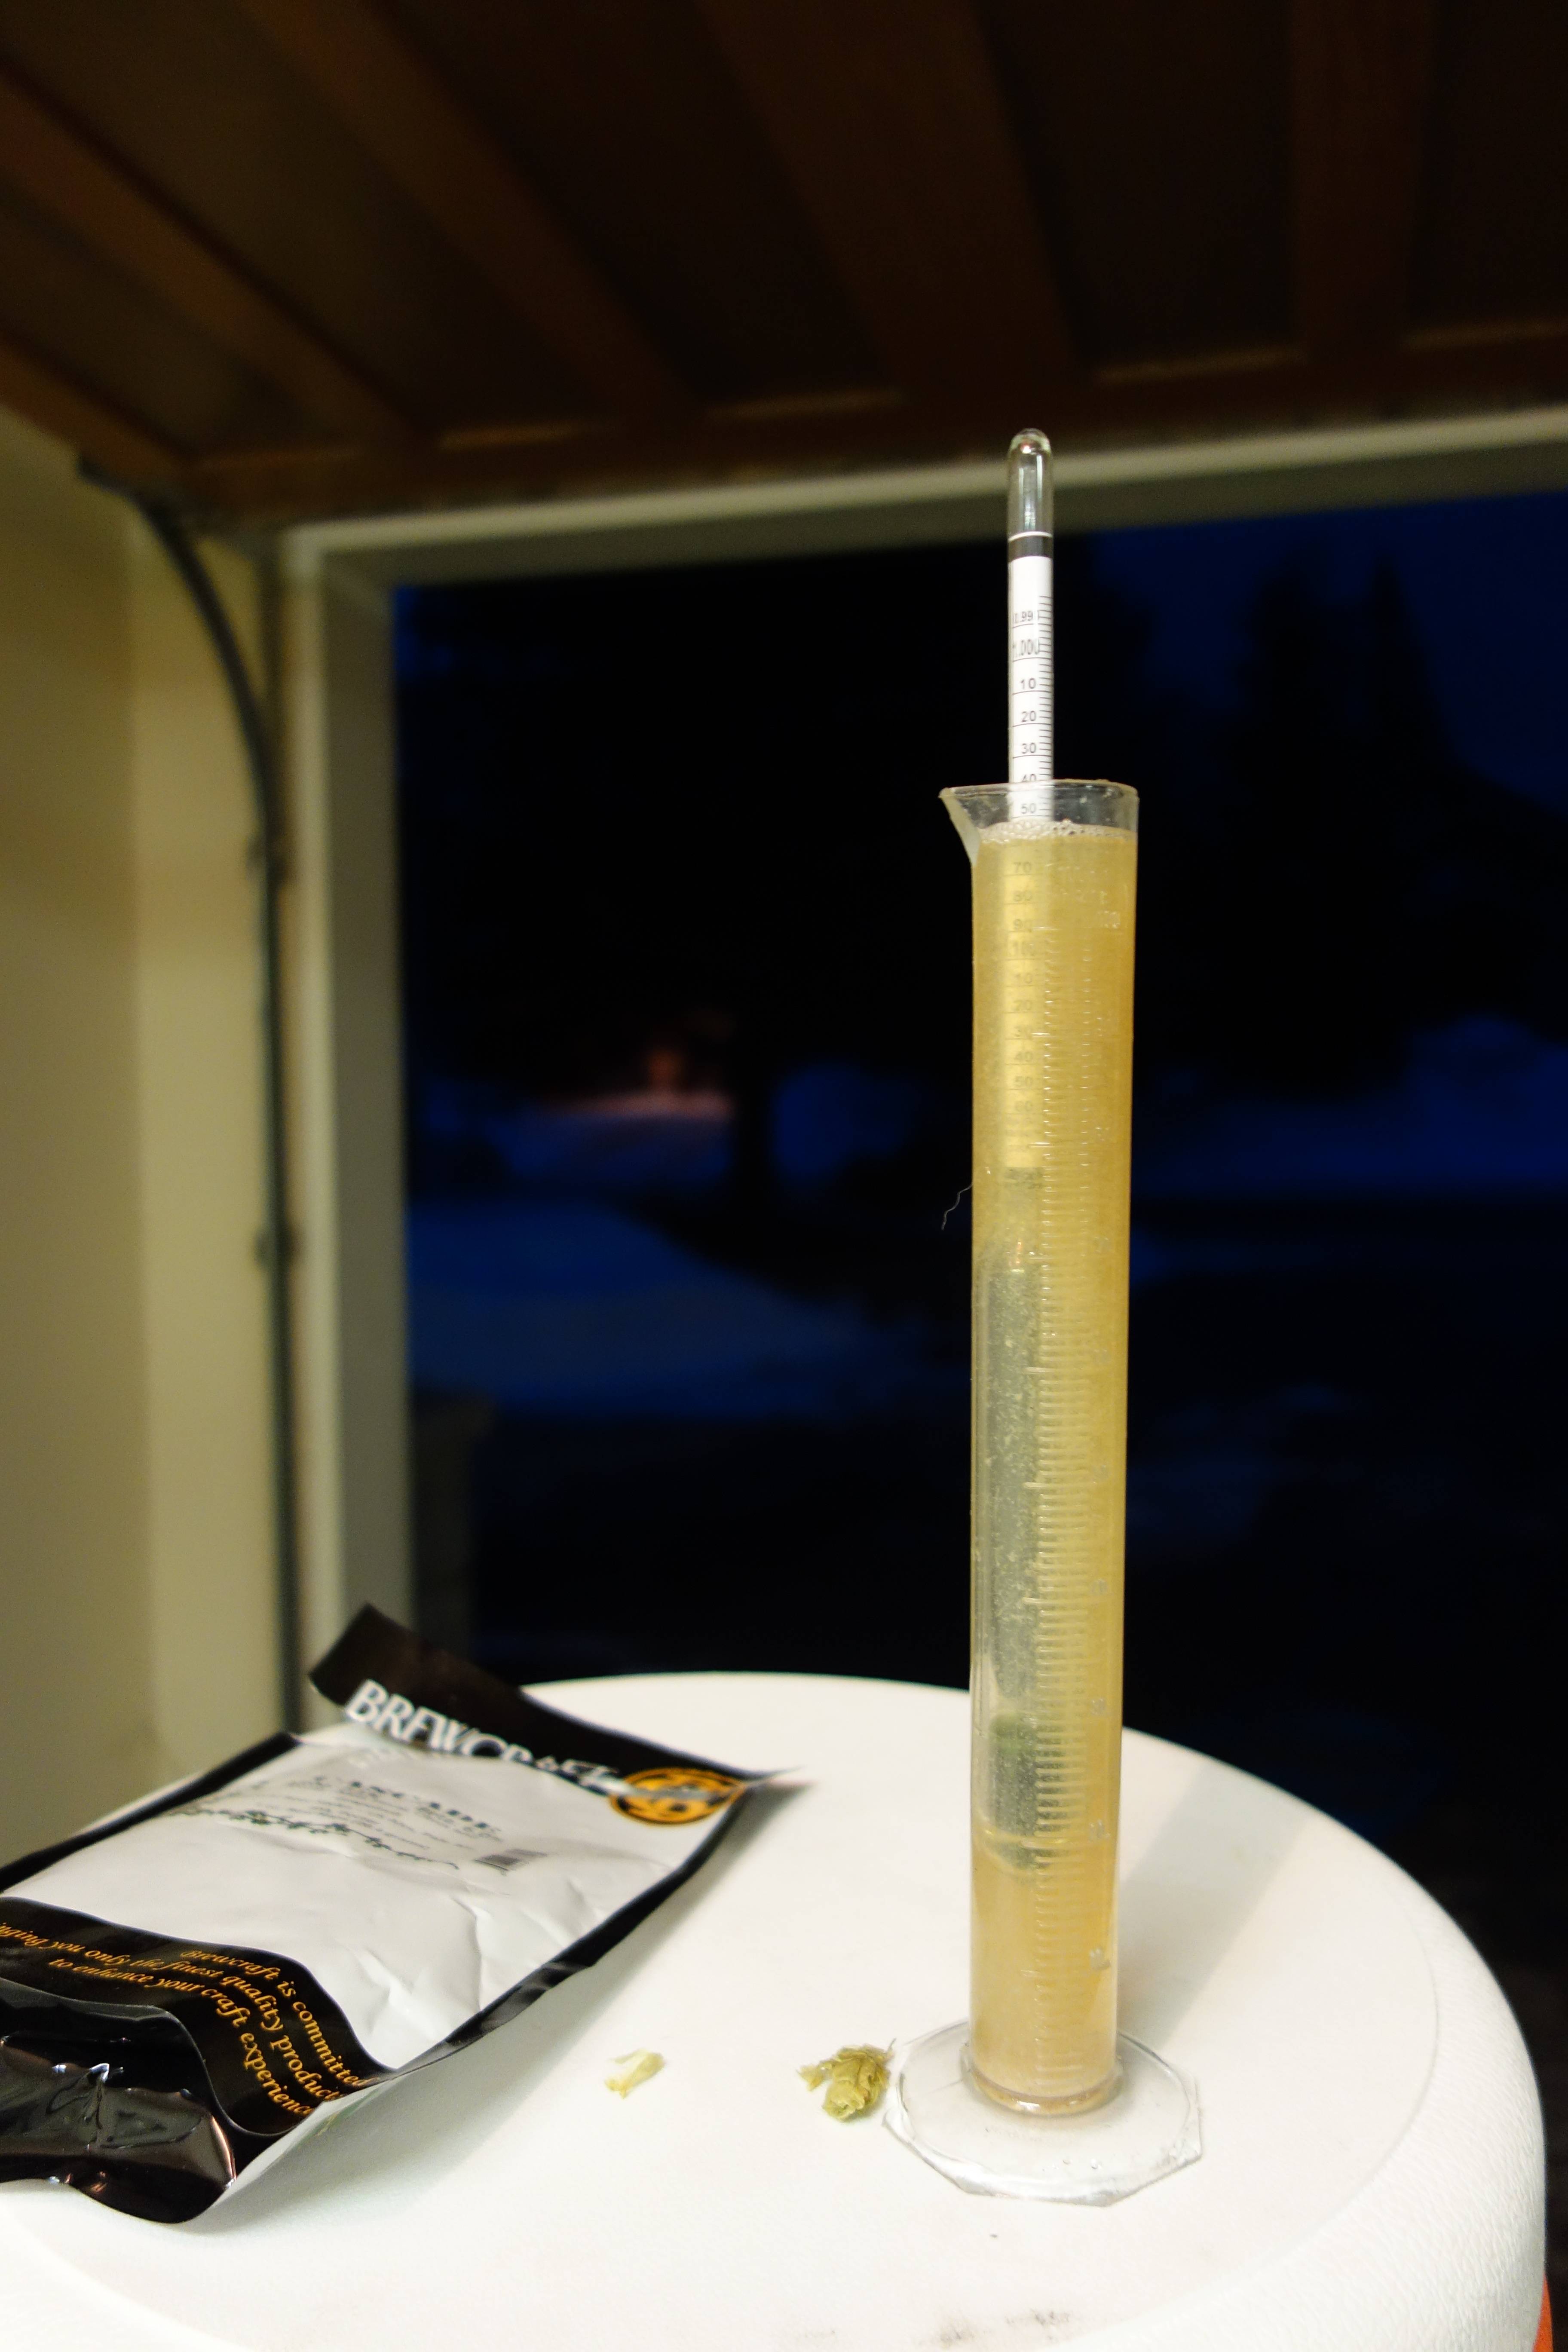
As I said I’m used to chucking in a bunch of speciality malts, so I was surprised at how pale the mash run-off from just the two row malt was. To my eye anyway it wasn’t much darker than lager malts which I’d brewed with in the past. To give you an idea, here’s the strong wort, weak wort and post boil wort while I was taking gravity measurements.

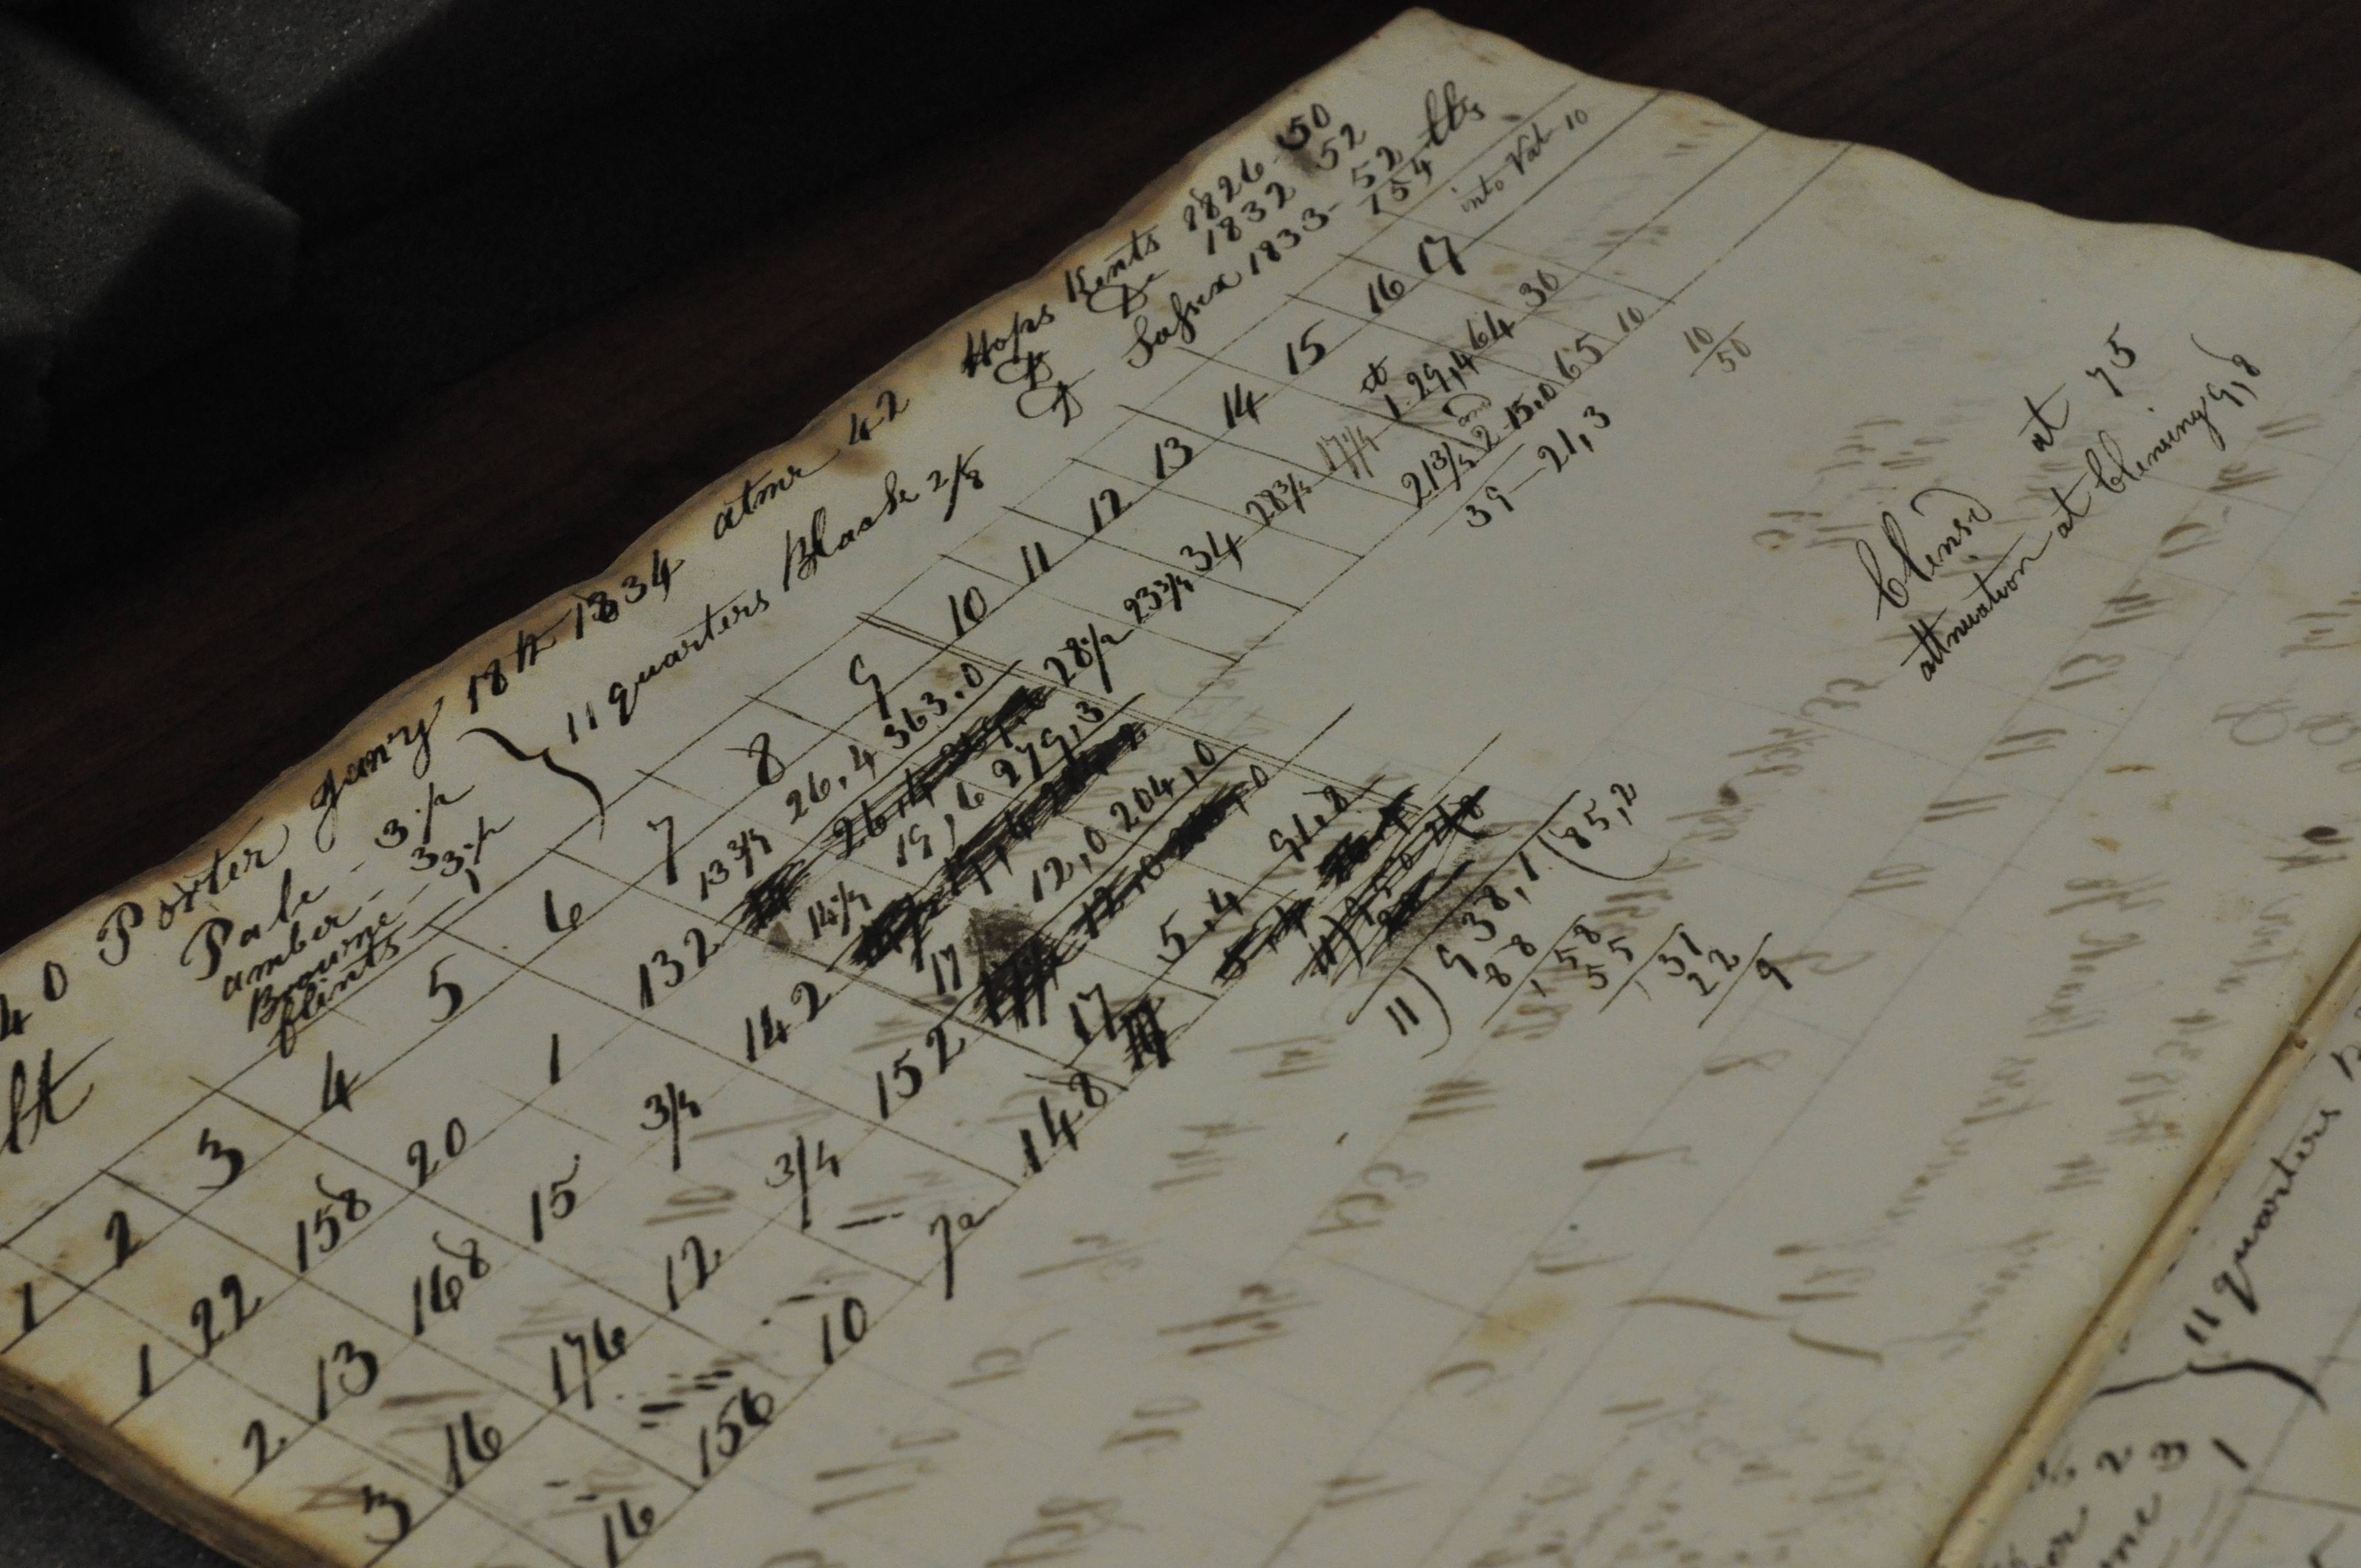
This is a potential area of problem for SMaSH brewing. Although once upon a time it was common to brew dark beers with just one malt variety giving fermentable sugars and colour (porter and brown malt being a famous example), nowadays coloured malt tends to be not very fermentable and only used in small quantities with a more fermentable base malt. So brewing an all crystal malt beer would give a unfermentable wort and a very sweet beer. At least that’s the theory- I’ve never tried it. To counter this, SMaSH brewers sometimes use more lightly kilned speciality malts like Munich malt to give a darker colour and more body. However, it would be difficult to brew, for example, a dry stout using only one malt variety. For this reason, pale ales and IPAs are common SMaSH styles. Which I was quite happy with as I’m going through a bit of a pale ale drinking patch anyway.
It being a pale ale, the most important ingredient going into the beer was the hops. I chose cascades partly based on the success of commercial single hop cascade beers- Alexander Keith’s have been advertising their Cascade pale ale like crazy, including heavy Super Bowl rotation, and I had to one-up them. It’s also the hop more than any other credited with kicking off the microbrewing revolution, so it felt like time to pay my dues.
And, you know what, despite having its time in the sun as the hop de jour, a crown passed down to some other hops beginning with the letter C, a bunch of Aussie upstarts and lately some hops that are so new and cool they don’t even have names yet, Cascade is still kicking butt like its 1995. Or 1971, which is apparently when it was first bred, which makes me feel like a young upstart. Whatever, it tastes really good.
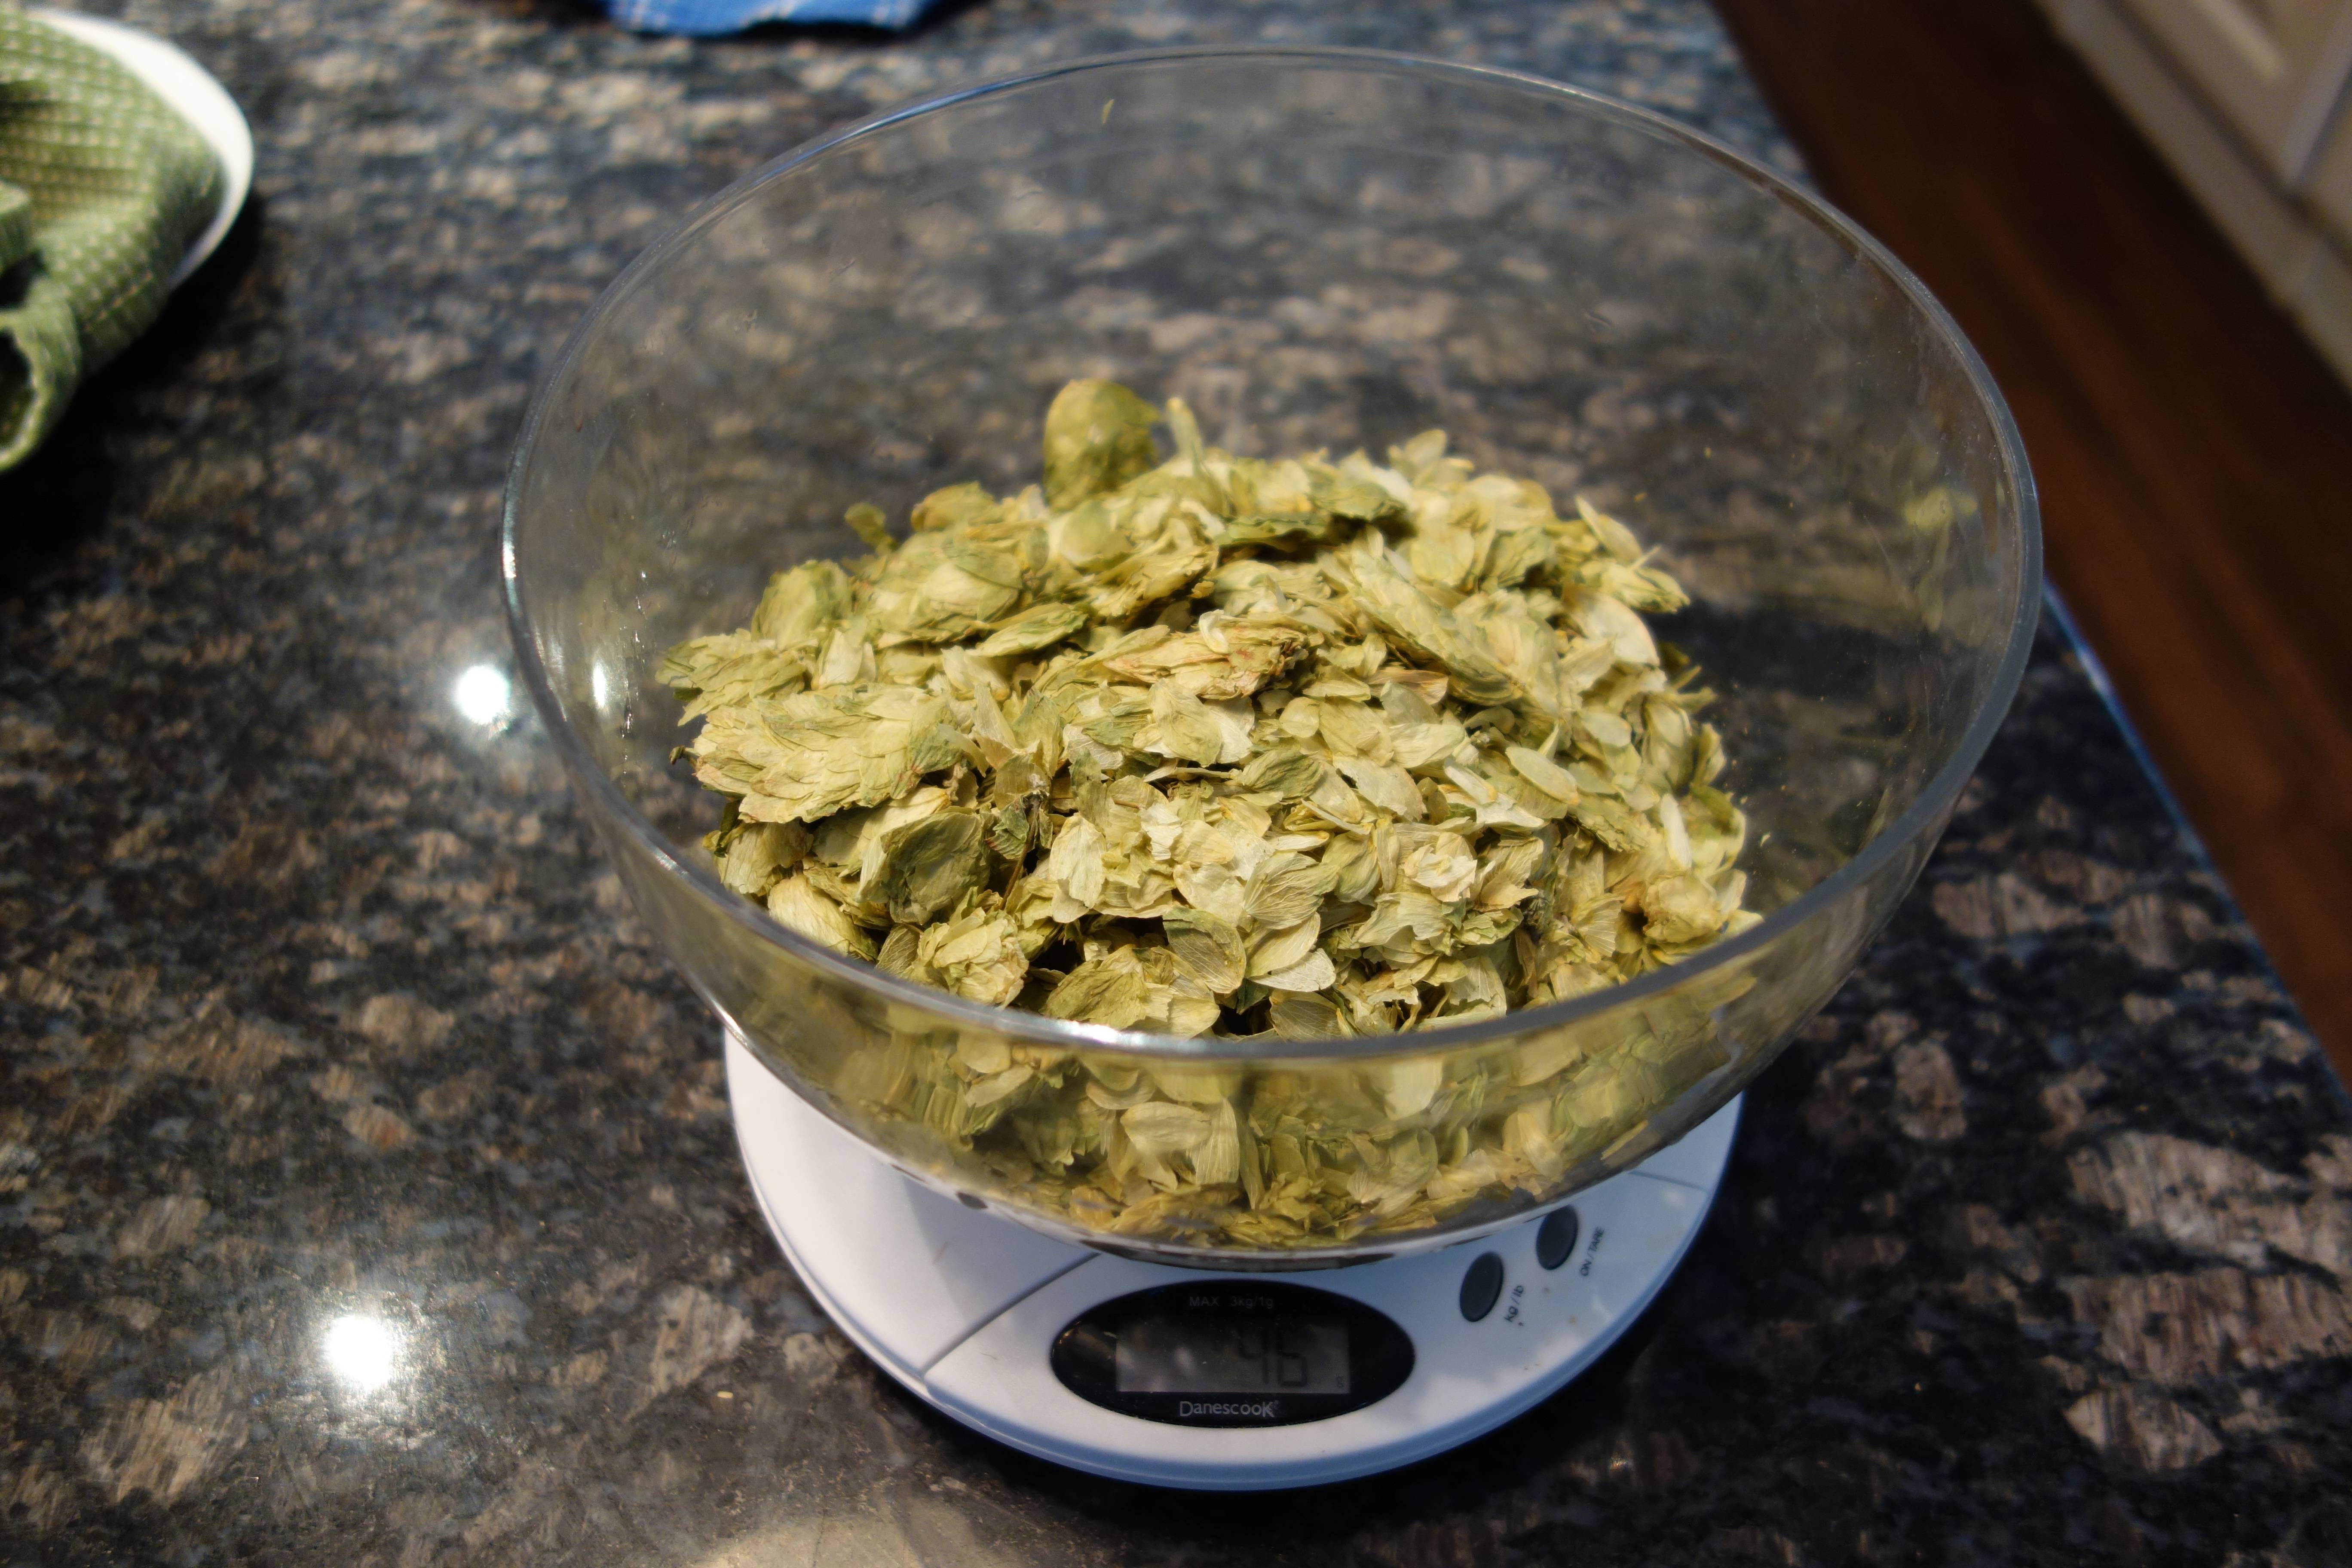
To make the most out of such a great ingredient, I made hop additions at 90 minutes, 10 minutes and 0 minutes to flame out, as well as racking onto some pellets in primary (unfortunately I had to leave the beer for a couple of weeks so couldn’t dry hop in a secondary vessel as I usually would). Another thing I mentioned in my last post was some difficulty with pellet hops. Well another great thing about Cascade is its availability, and I had no problem getting hold of enough leaf hops to use them exclusively during the boil. Which is more than can be said for most other varieties, but that’s another story.
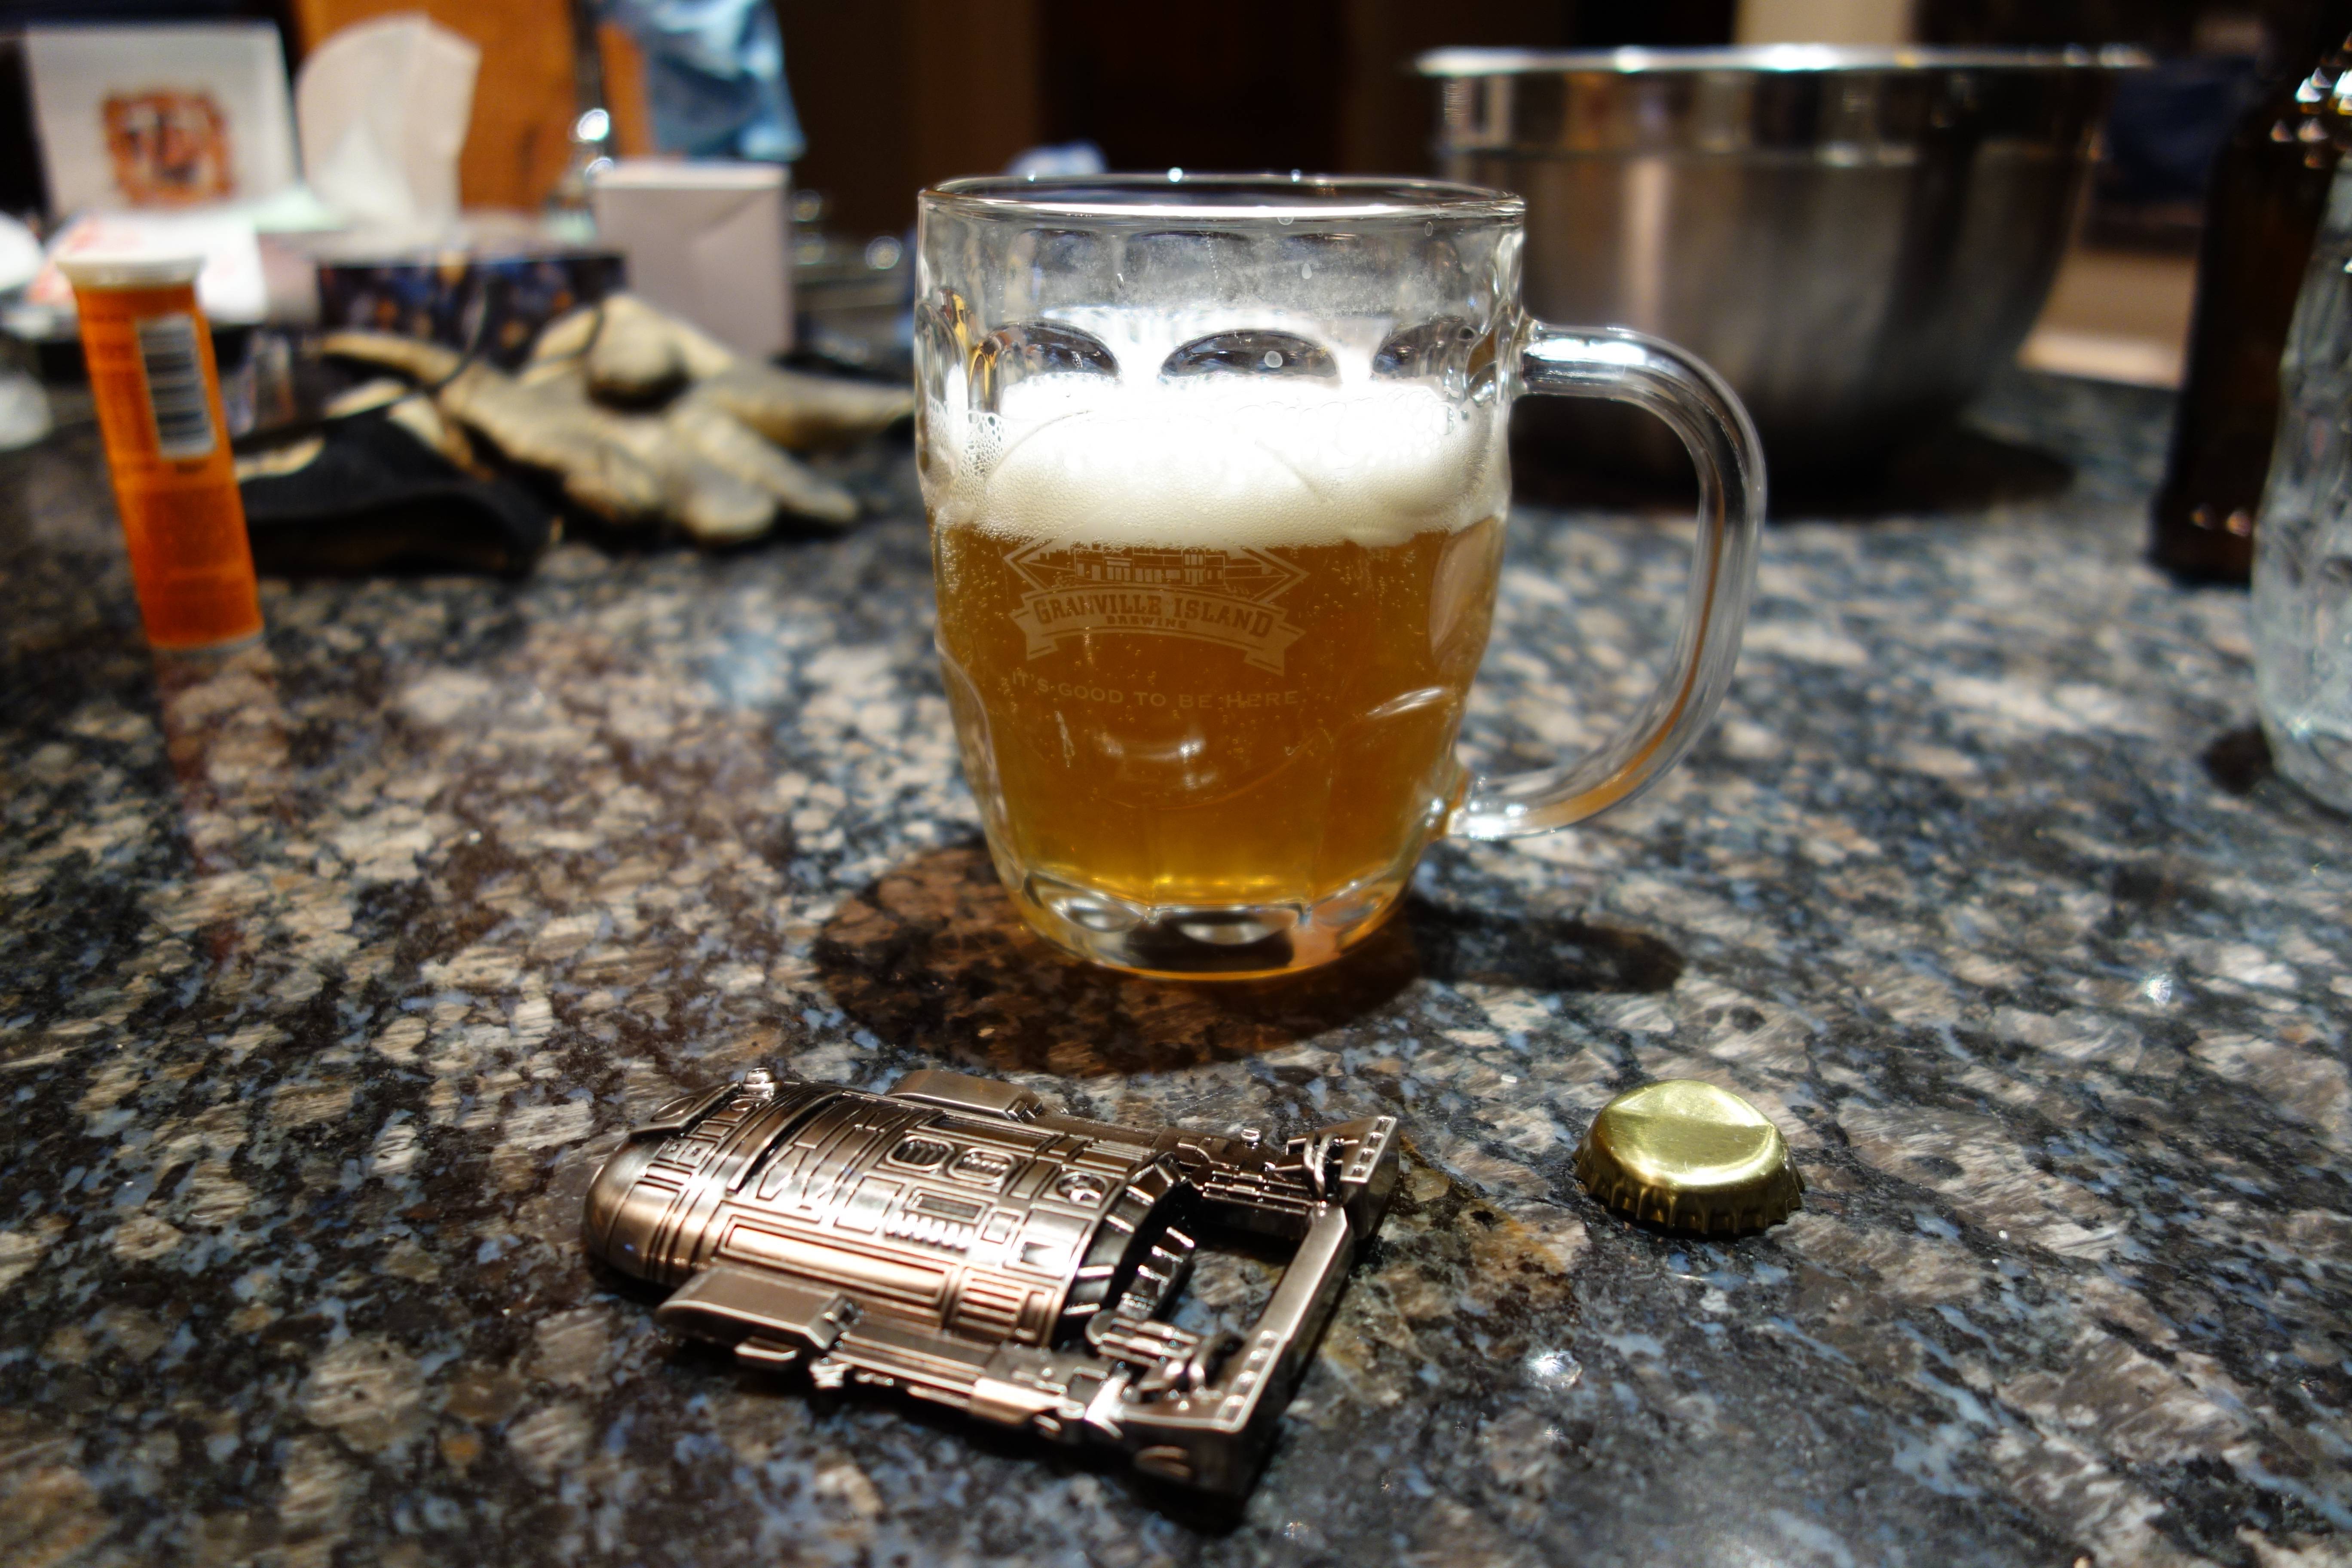
So, what you’ll be dying to know, other than where I got my AWESOME R2-D2 bottle opener from (I don’t know, my even more awesome gal gave it to me!), is- is it any good? And I’d say yes, it’s great. Substantially better than the last brew in fact, which is always heartening. If it has any flaw it’s that I’d like it to be bigger and hoppier, but the recipe was designed to be a sessionable pale ale, which is pretty much what it is. It’s quite Sierra Nevada Pale Ale in hop character, but the Brit ale yeast gives it a bit more fruitiness compared to the Chico yeast strain. Which, to be honest, I’d use more if it weren’t for its piss poor flocculation. In fact I’ve got a wyeast pack of it in the fridge, so a reboot may be in order. As for body, it’s pleasantly dry which I’m quite liking at the moment compared to more caramely, darker ‘pale ales’. So yeah, overall, I’m pretty chuffed, and it’s disappearing fairly quickly. I get the feeling I might have to ramp up the hops and ABV for next time- I think the west coast is rubbing off on me. Obviously there’s considerable room for improvement, especially with yeast/fermentation. In fact, that’s probably going to take up a couple of posts in the near future, as I’m expanding my kit to include at least some degree of control over yeast pitching rates and temperature control. So I’ll have even fewer excuses if I make anything pants from now on. Here’s a little teaser of what I’ve been putting together this evening (no fires/electrocution yet):

Thermostatically controlled phone charging (Also GoT arrived in the post this morning...)
Papa's Got A Brand New Bag
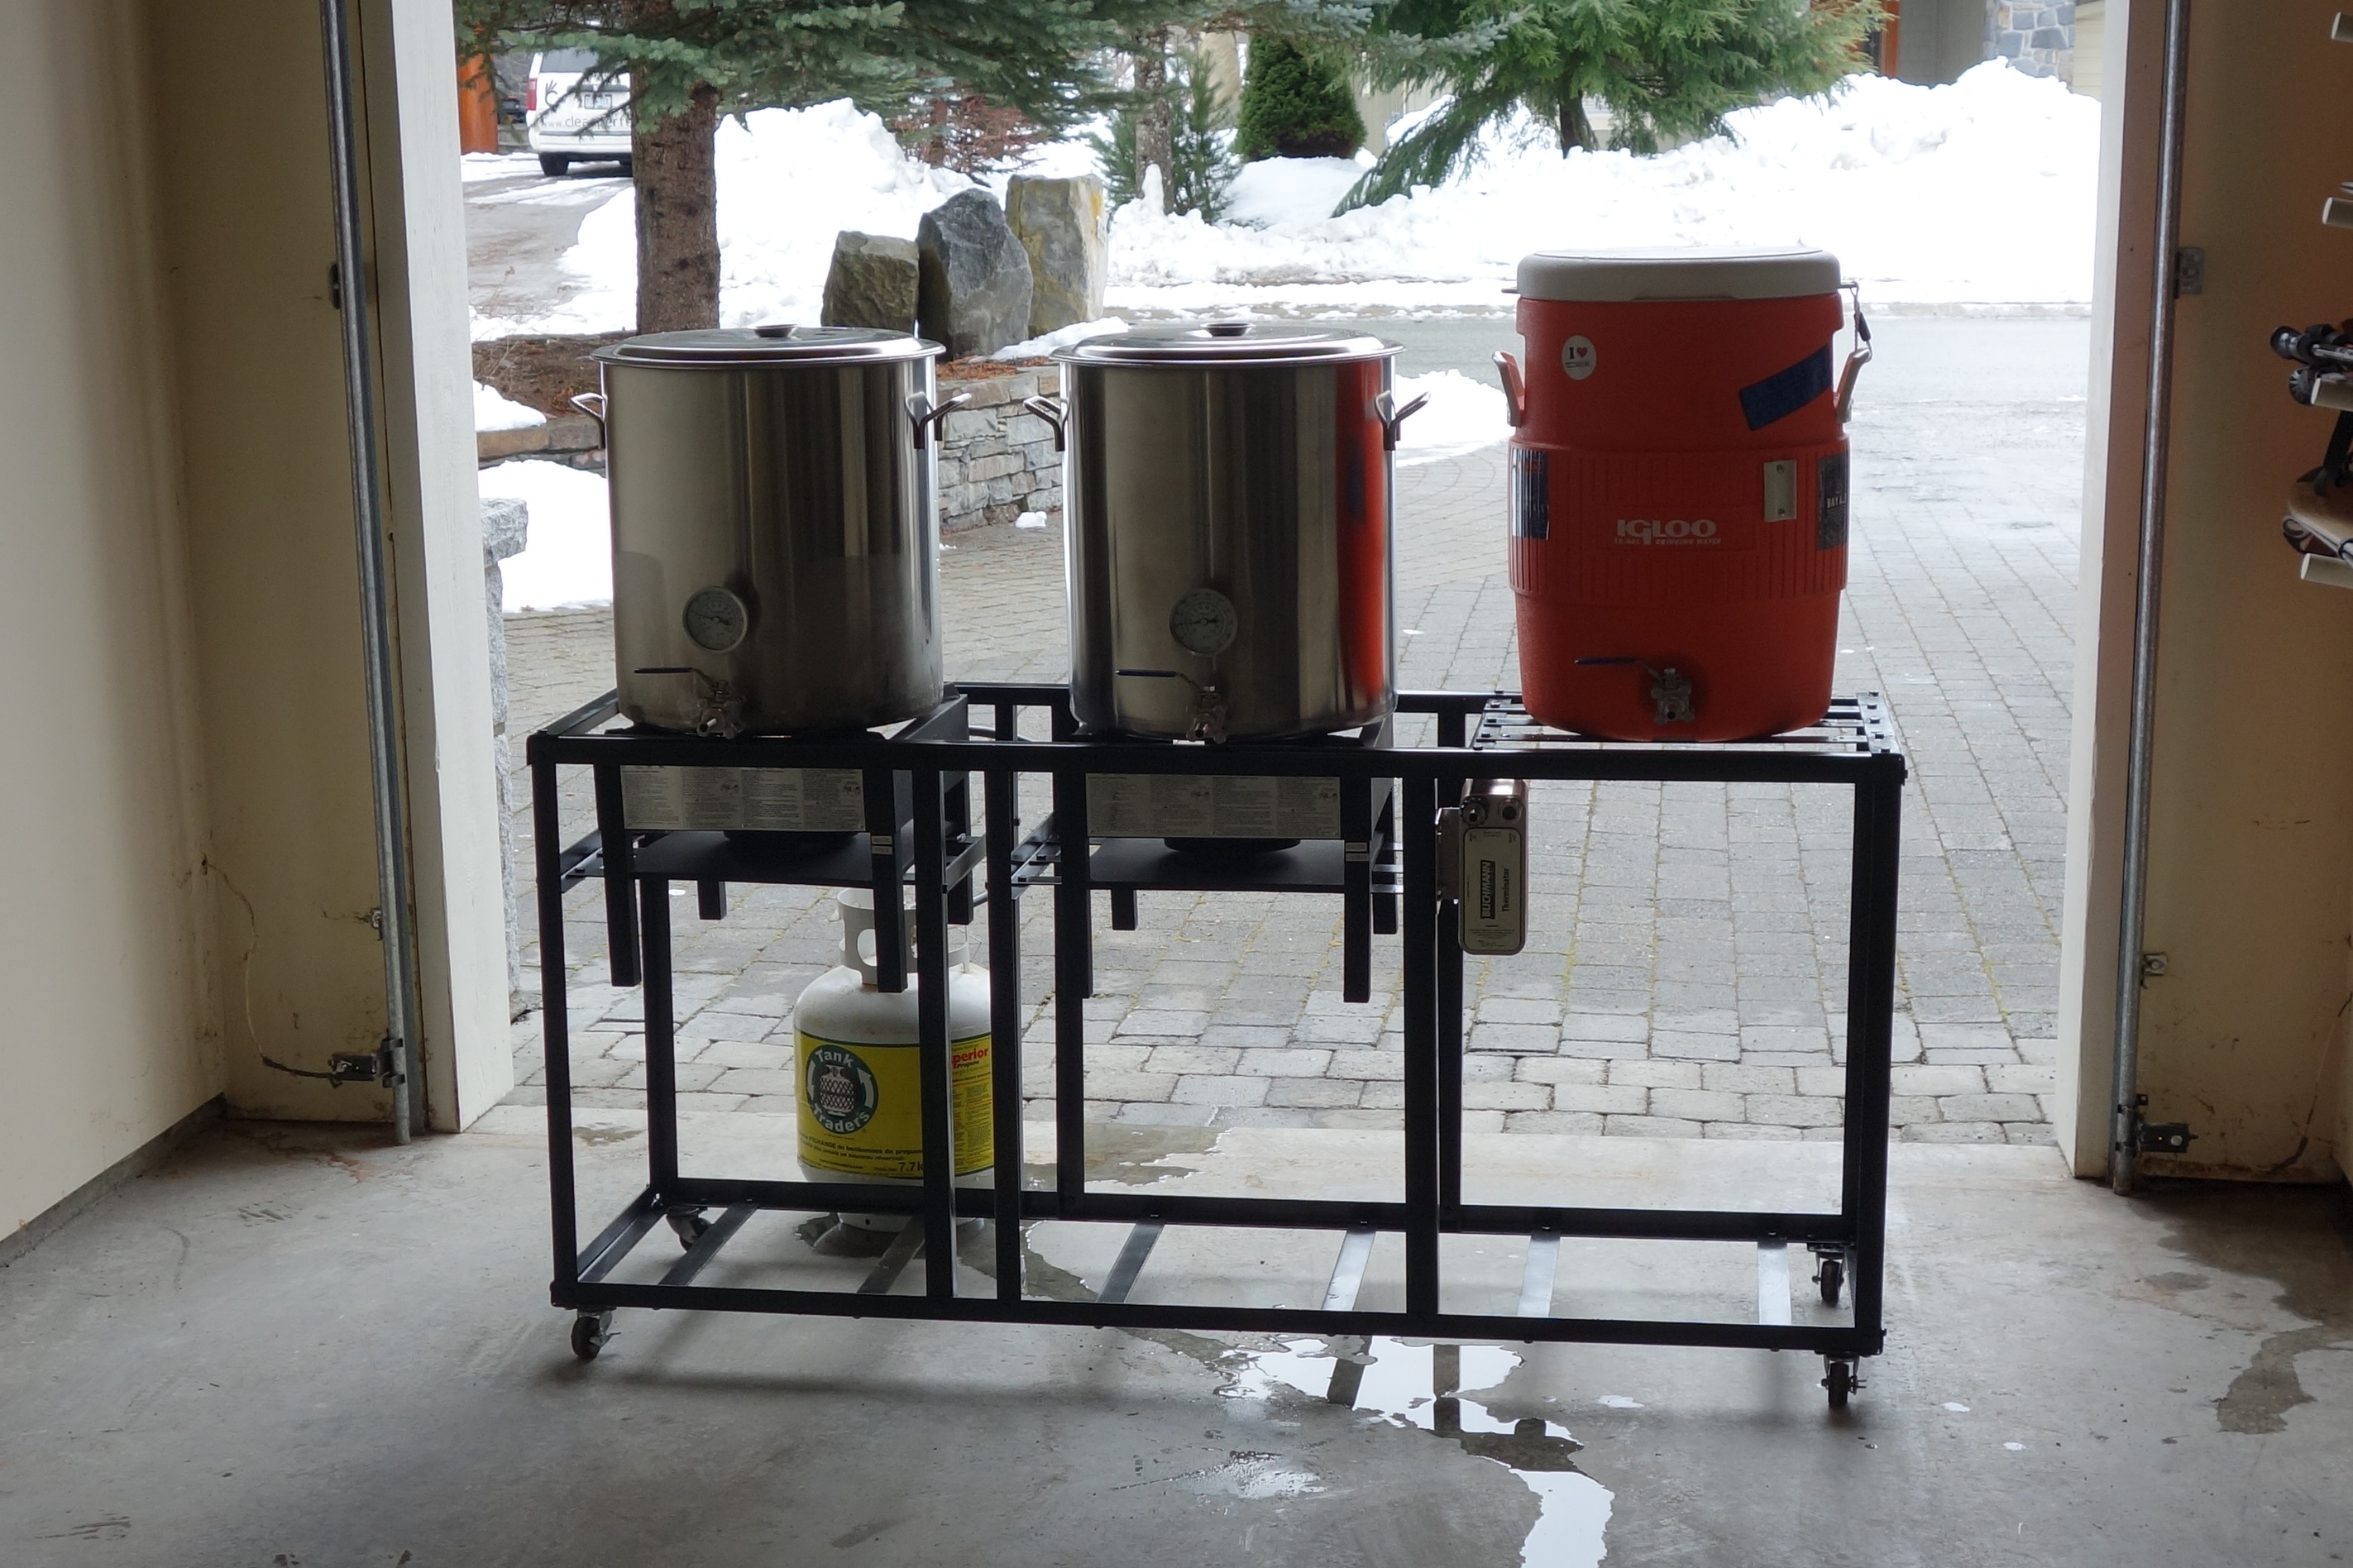
Yes, sadly when Naomi and I moved to Canada in January my old kit wouldn’t fit in my luggage. So I did the only reasonable thing- I decided to do it all again as soon as possible. Except, this time I’d buy/make all the gear I’d always wanted at home. Massively inefficient propane burners? They look awesome and dangerous, let’s get it done. A beer fridge? Definitely need one of them. An automatic malt mill? Crucial. Shiny new stainless steel vessels? Of course.
With all that gear and prior accusations of “taking over the house” fresh in my mind, I realised I needed somewhere to contain all of my new stuff. So I made another totally rational decision. Of all the brewing kit I’d ever lusted after, without doubt top of the list was a dedicated stand to ‘contain’ all of my kit. A so called brewing sculpture. Now, I don’t have a sculpture in me- I can’t weld, didn’t own any tools and am a bit crap at DIY. But how hard could it be to drill a few holes and bolt some metal together, right? And could I really consider myself a dedicated homebrewer unless I had a permanent hulking shrine to the hobby taking up space in the garage? Answers on a postcard please.
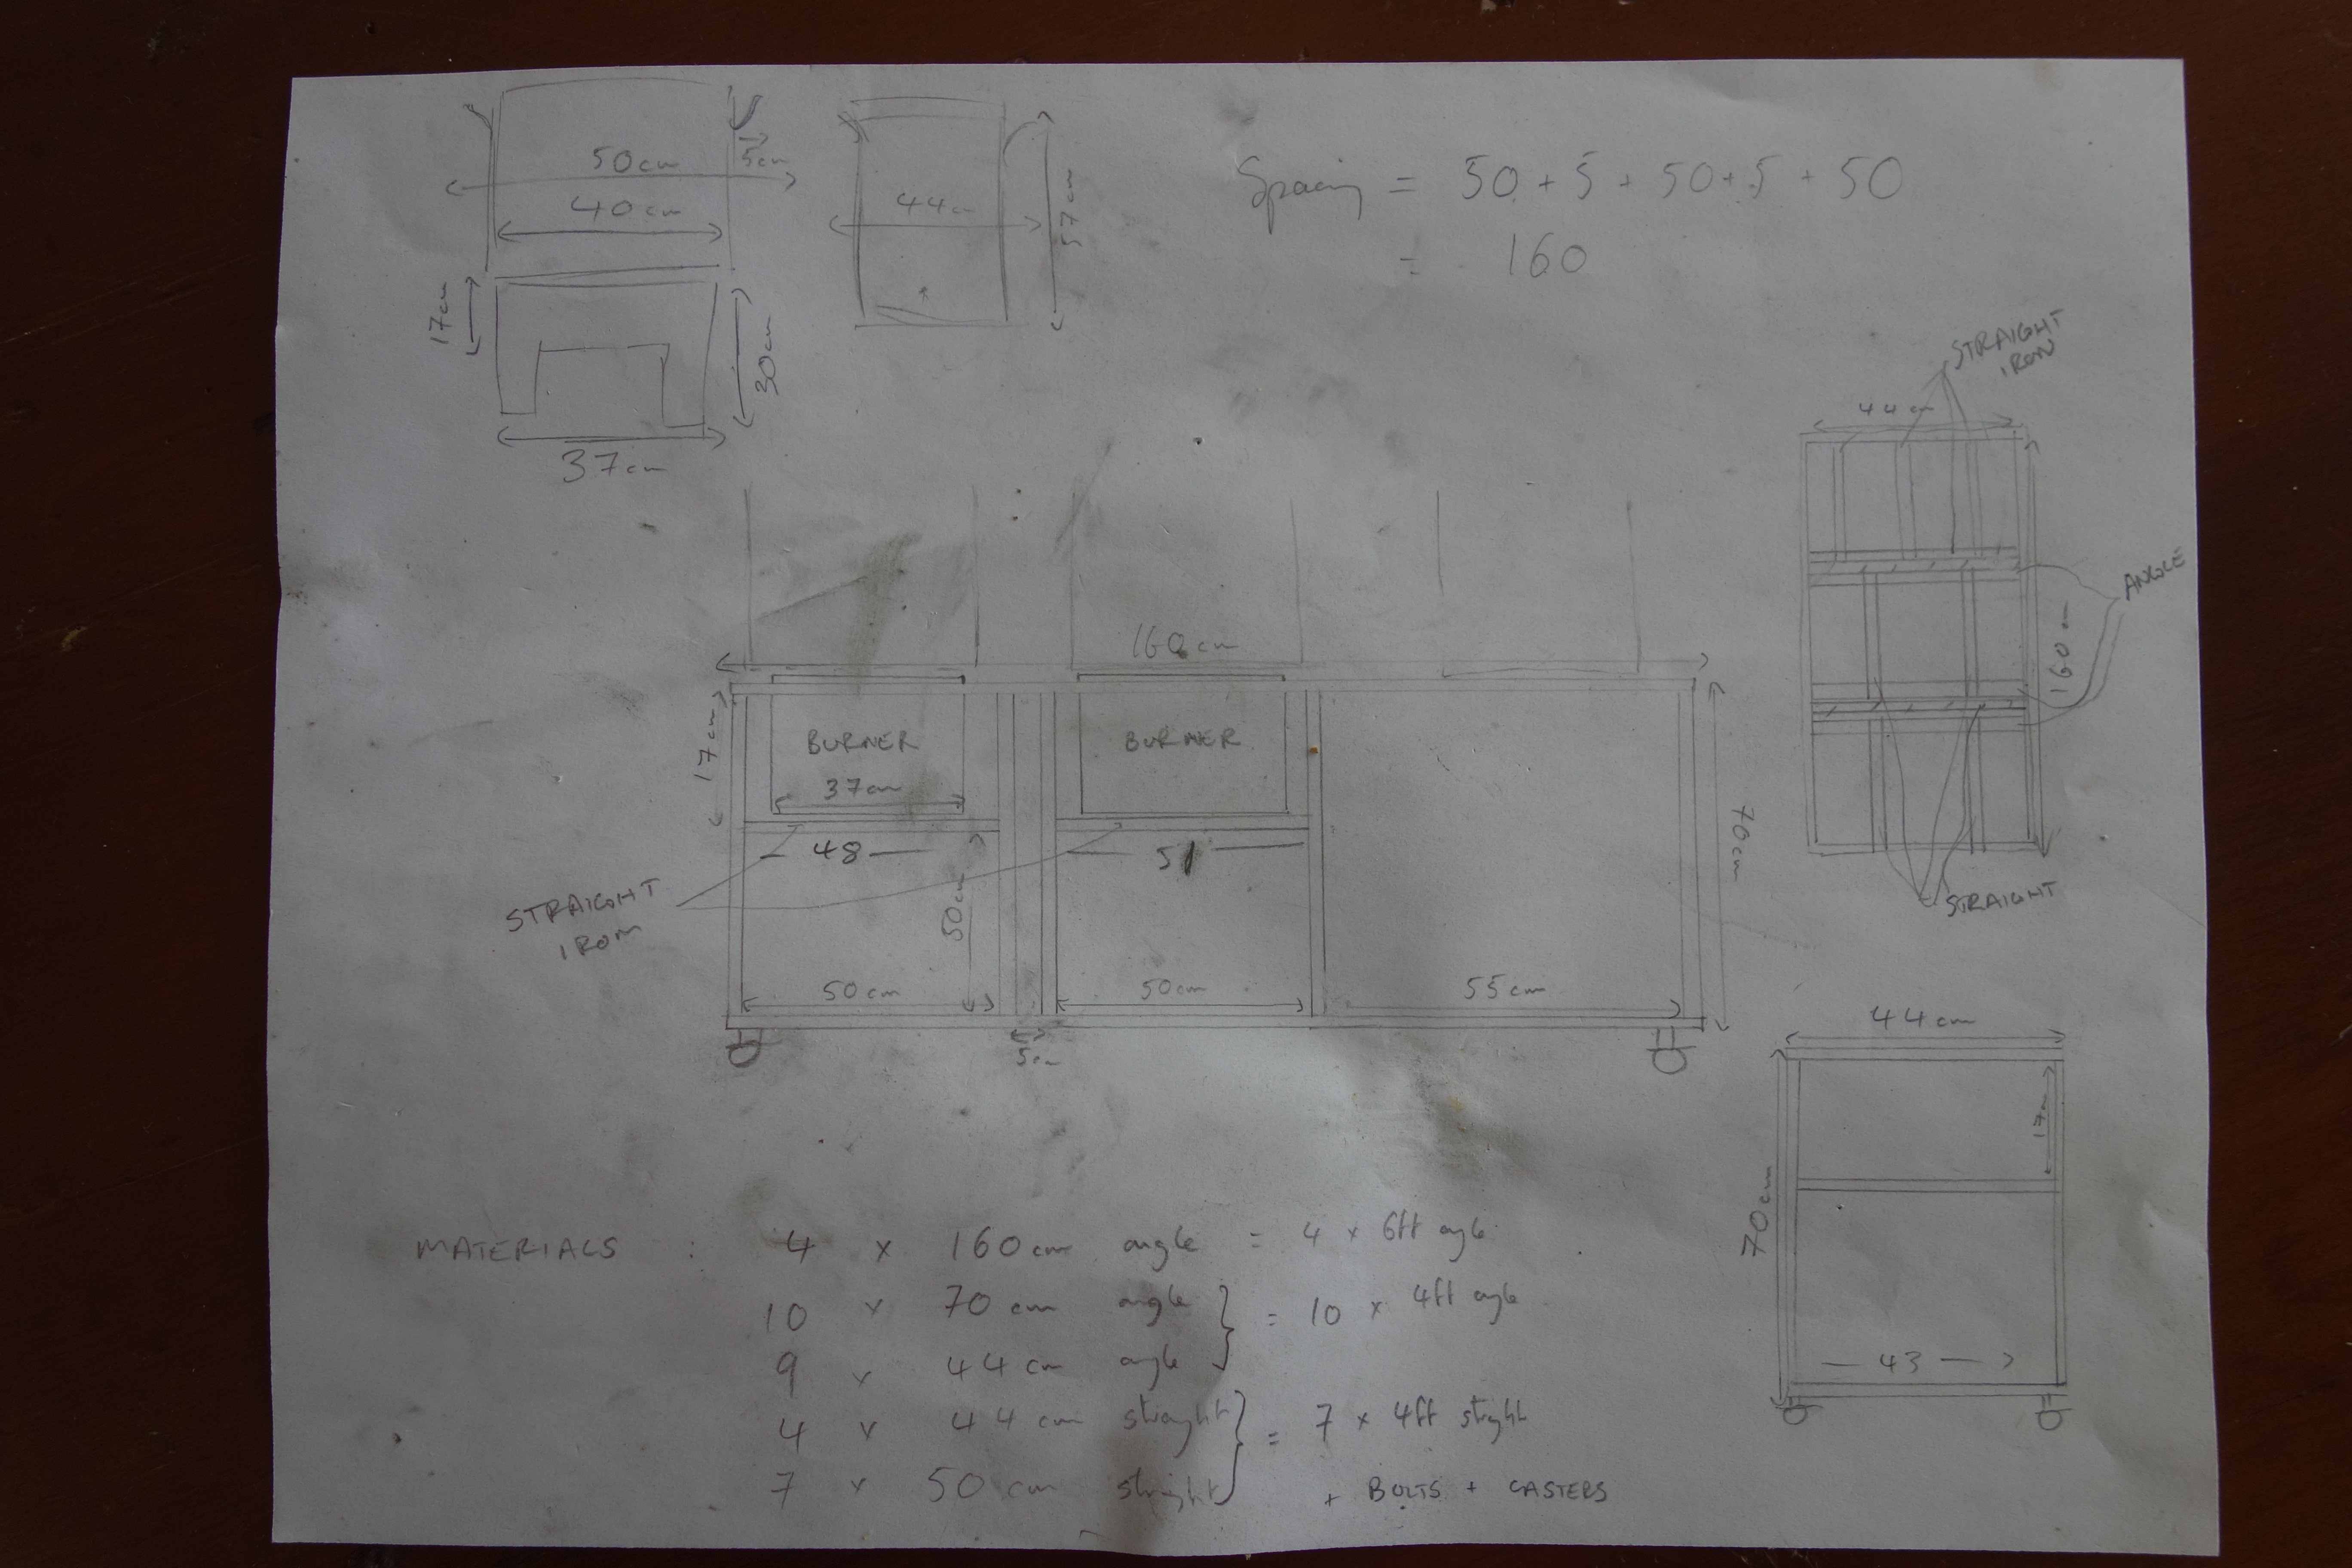
Anyway, blissfully ignorant of the blood, sweat, tears and trips to Home Depot of the next two weeks, I started out with these very rough plans and an idea to make a weldless stand out of mild angle steel that would take three brew vessels, two of them powered by propane burners. For burners, I didn’t want to fuss with connecting up the cast iron ‘Banjo’ type burners along with the heat shields they necessitate, but wanted to be able to drop in a burner already connected to a stand and regulator such as this one. This was mainly for simplicity- I don’t know much about propane, and custom plumbing a gas line into the back of the stand seemed like a recipe for making an early departure from this mortal coil.
As for materials, I wanted something that would be sturdy enough to hold three full 10 gallon vessels, but also easy enough to cut and drill. The compromise I came up with was to use 1 1/4” angle stock like this. This is similar to the iron used in old bed frames, which I considered, but decided against due to the amount of angle grinding it would have taken to clean the average used bed frame up. It unfortunately wasn’t cheap however, as my design required four 6 foot pieces, ten 4 foot pieces and seven 4 foot lengths of straight iron such as this. To bolt this lot together took around 80 stainless 1/4” nuts and bolts, and I put the whole thing on Home Depot casters rated to about 100kg each. To do the assembly I also had to purchase a small angle grinder and a drill, which I’ve ended up using to power my mill. All in all, on day one when I had all of this in a pile on the garage floor, my only thought was- what have I done? It looked like I’d transported the set of Scrapheap Challenge into the house.
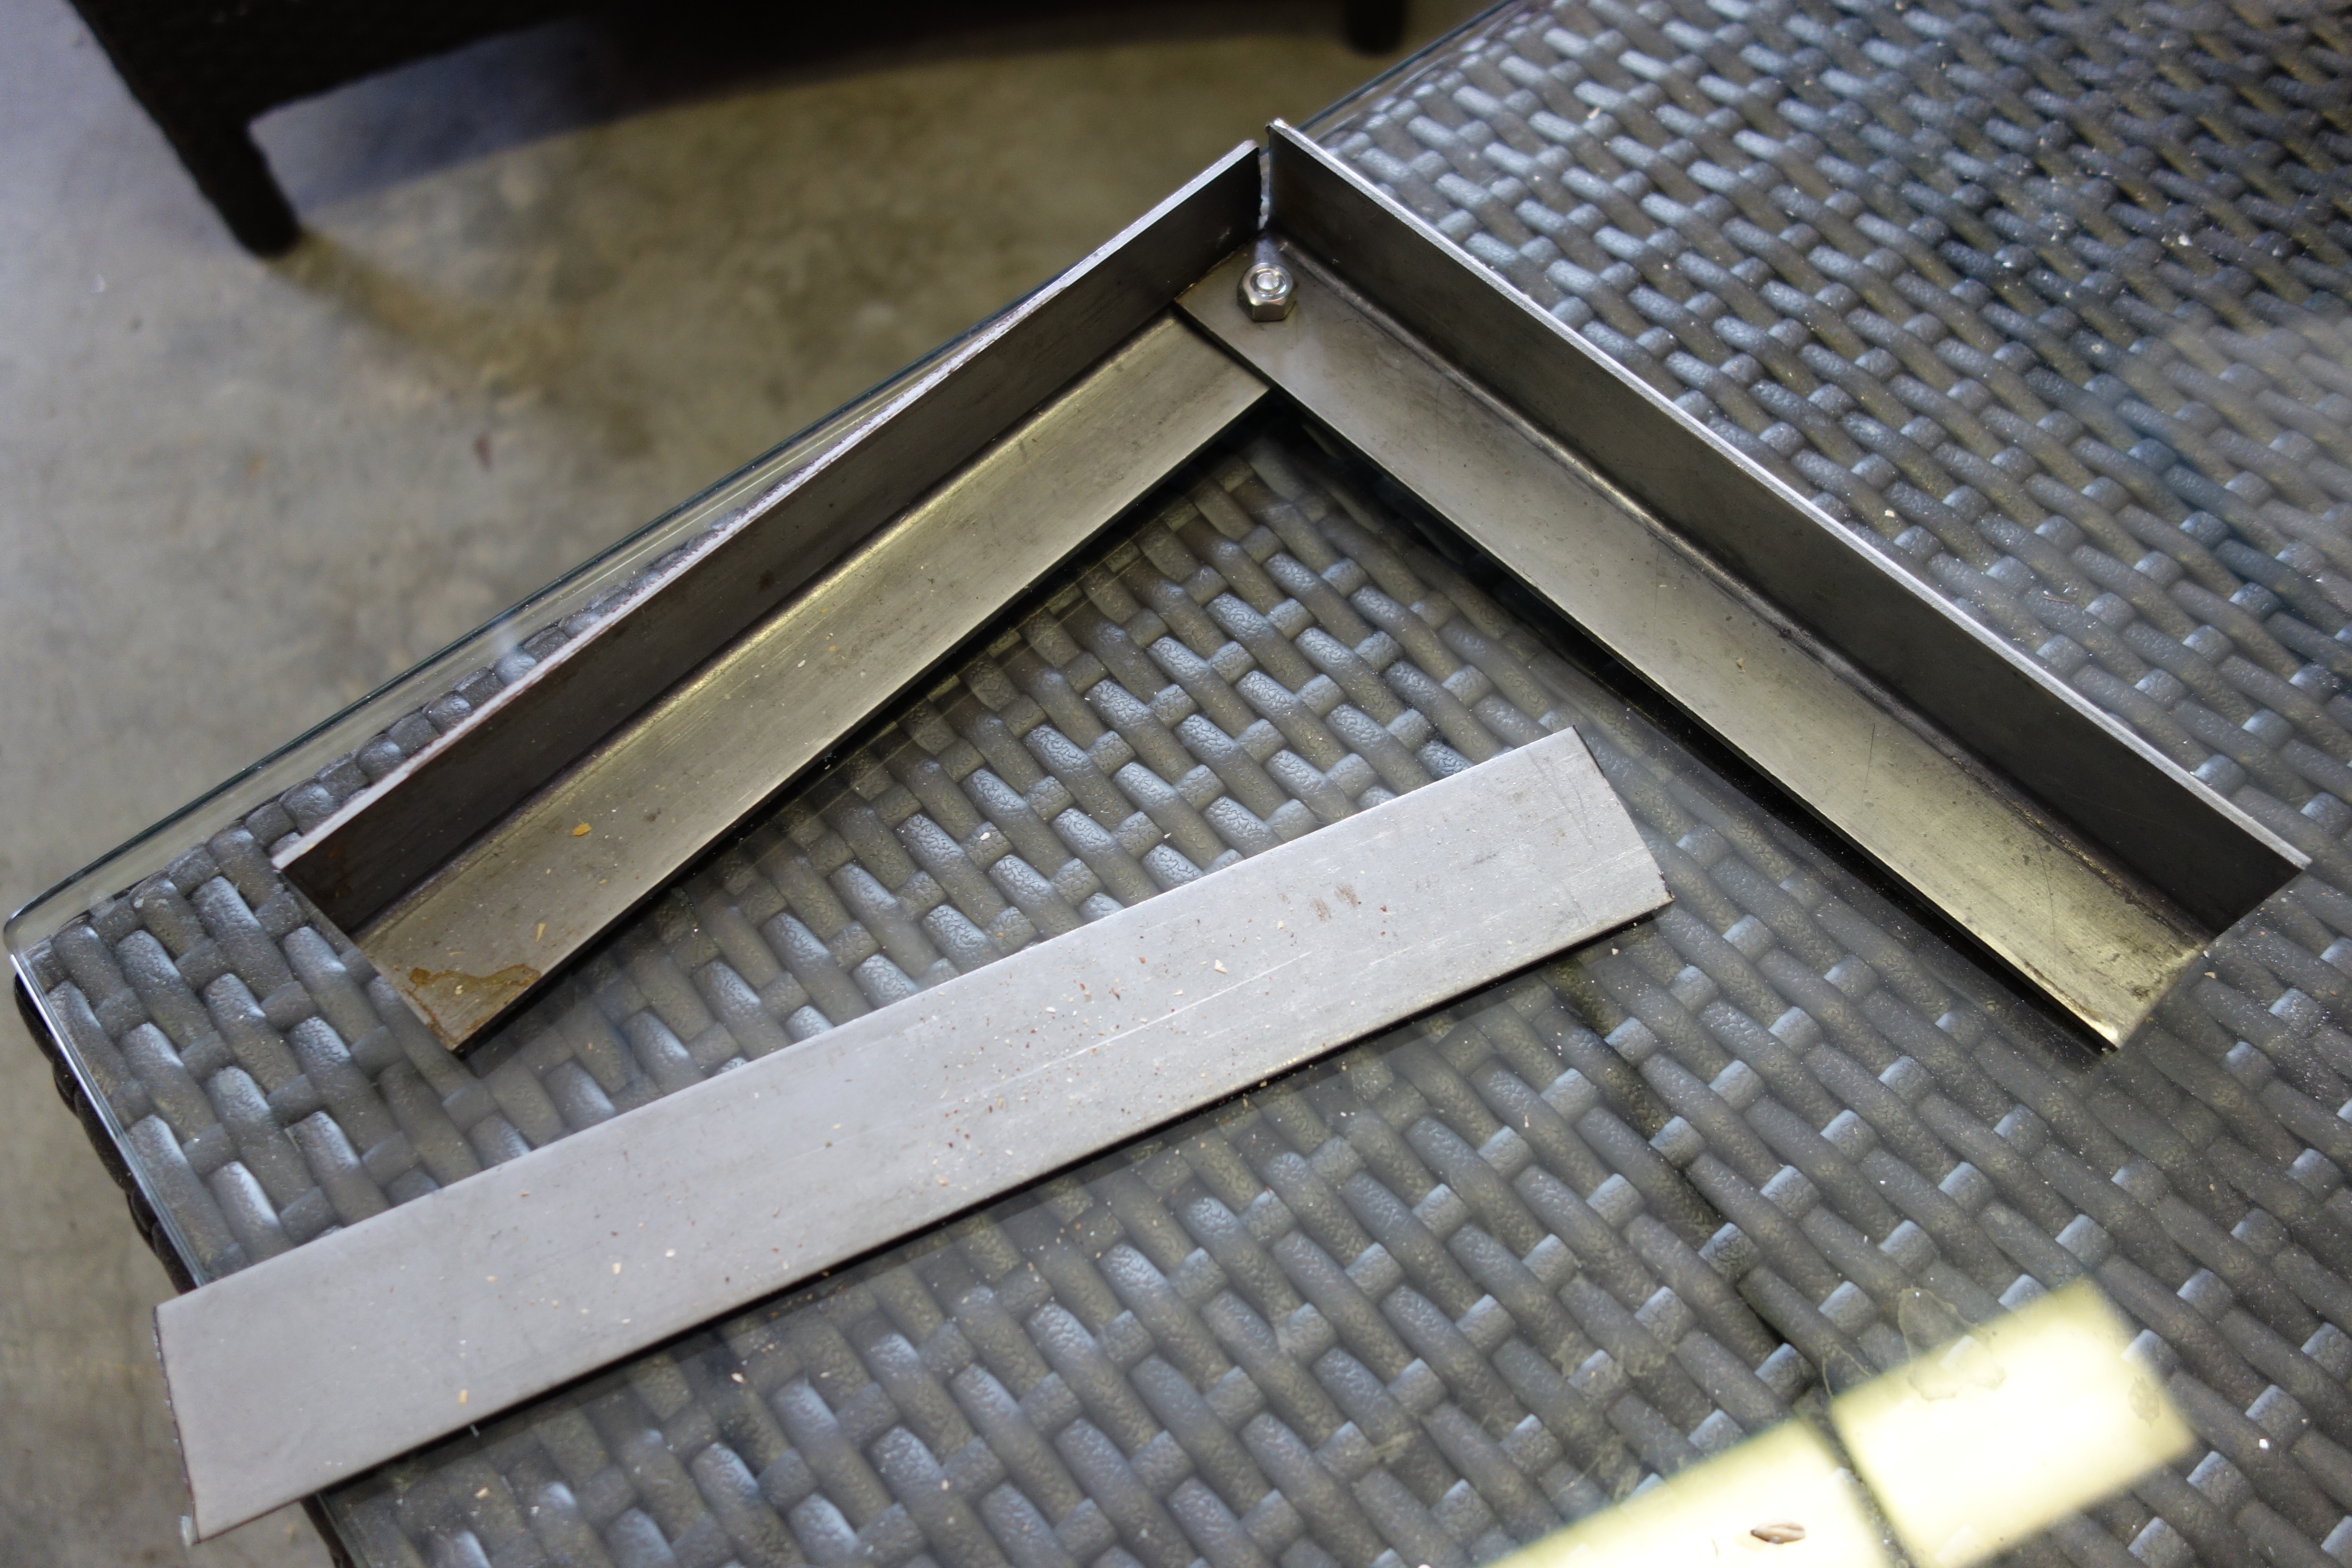
The first test corner
The first step was cutting the lengths of angle down to size. The ten 4 foot lengths became ten 70 cm and ten 44 cm pieces each, making up the height and depth pieces of the stand. The length pieces were cut to 160cm, the length I wanted to keep the burners away from my new plastic mash tun but without taking up a ridiculous amount of space. This involved my first experience of cutting using the angle grinder. Which, if you’ve never done before, I’m going to say now you haven’t lived. You’ll feel like a fire bringing God and like you are about to cut your own leg off all at once. Luckily the only damage inflicted was a hole in the back of my glove- next time I’ll definitely spring for leather gloves rather than polyester ones. You live and learn.
I built the base of the stand first, trying to keep the angles as close to right angles as possible before building the outer frame of the stand. When it resembled a 3D rectangle, I put the casters on so I could move it around before filling in the supports to hold the burners and mash tun. Finally I bolted in cross members on the base of the stand so that the vessels store inside the frame when not in use.

As you’ll be able to see, the two burner stations for hot liquor tank and kettle are the left hand and centre positions, with the mash tun sitting on top of the stand on the right. At this point the metal was left in its unfinished state, which I liked, but which would have unfortunately rusted. So I sanded it down using a rotary sander and then painted it. Another live and learn moment- I bought a sanding pad attachment for the angle grinder, but it turned out to not so much lightly sand as dissolve the metal. So that’ll be staying in the box from now on.


Painting the thing was a bit of an interesting experience too, as the can of VHT metallic black engine paint I bought turned out to not even coat half the stand. I rushed down to the local automotive store (the can says to paint all coats within an hour) and the assistant there recommended two cans of brake calliper paint by the same brand. On the whole this worked loads better, giving a pretty even coat which is apparently safe up to almost 1000 degrees C. The downside with any automobile paint on something like this is that it’s impossible to cure the paint as recommended on the can- I didn’t even have a heat gun to half arse it, never mind a curing oven. Despite this the paint is definitely functional- it gets a bit scratched when sliding the stainless pots around, but isn’t soft enough to mark with a finger nail. On the whole I think I’ll live with it, and have a bit of paint left for any touch-ups if I can be bothered.
To give a better idea how this should all work I’ve put a couple of pics below of the stand ‘fully-loaded’ both in use and in storage. On the whole I couldn’t exactly recommend this project to anyone unless they enjoyed self-harm and poverty. Having said that, if you’ve decided like I did that you want to do this I’m unlikely to put you off, and if that’s the case I’d recommend this type of construction if, like me, you decide that welding seems just a little too hazardous. You’ll almost certainly still be able to put together a functional brewing stand and with a bit of luck live to tell the tales of your manly awesomeness / new depths of weird and obsessive behaviour.

Sasquatch!